Whip Lights on Truck: The Ultimate Guide to Visibility, Safety, and Style
Whip Lights on Truck: The Ultimate Guide to Visibility, Safety, and Style In the world of trucks, utility and aesthetics often go hand-in-hand. While lift kits, oversized tires, and custom paint jobs grab attention, a growing trend is illuminating the roads and trails in a spectacular fashion: whip lights.
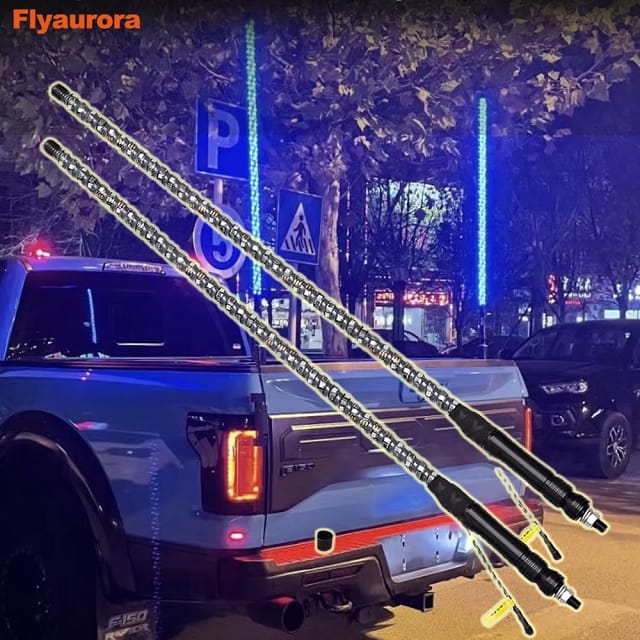
More than just a dazzling accessory, whip lights on trucks serve crucial functions, enhancing visibility, promoting safety, and adding an undeniable flair. If you’ve ever seen a truck blazing across the dunes at night, adorned with a vibrant, glowing pole, you’ve witnessed the magic of a whip light.
This comprehensive guide will delve into every aspect of whip lights for trucks, from their fundamental purpose and various types to installation tips, maintenance, and important legal considerations. Whether you’re an avid off-roader, a show truck enthusiast, or simply looking to make your vehicle stand out, understanding whip lights is the first step to illuminating your ride.
What Exactly Are Whip Lights?

At their core, whip lights are flexible, illuminated poles designed to be mounted vertically on vehicles, most commonly trucks, UTVs, ATVs, and Jeeps. Typically ranging from 2 to 8 feet or even taller, these “whips” are usually constructed from durable, flexible materials like fiberglass or polycarbonate, allowing them to bend and sway without breaking, much like a flag pole in the wind.
The illumination comes from internal LED strips that run the length of the pole. Modern whip lights often feature high-density RGB (Red, Green, Blue) LEDs, allowing for a vast spectrum of colors and dynamic patterns, including chasing, strobing, and fading effects. Many advanced models can be controlled via a smartphone app or a dedicated remote, offering unparalleled customization of light sequences to match mood, music, or event themes. Some basic models offer solid colors or simpler multi-color functions. Their flexibility, combined with vibrant illumination, makes them highly visible and visually striking.
Why Install Whip Lights on Your Truck? The Benefits Unveiled

The appeal of whip lights extends far beyond mere aesthetics. They offer a range of practical benefits that enhance both safety and the overall experience of owning a truck.
- Enhanced Visibility: This is arguably the primary benefit. When driving off-road, especially in dusty conditions, dense fog, or at night, your truck can easily become obscured. A tall, brightly lit whip light extends above the vehicle’s profile, making it significantly more visible to other drivers, riders, and even pedestrians. This is particularly crucial in environments like sand dunes, where vehicles cresting hills can be a sudden surprise.
- Safety in Convoys: For groups traveling together off-road, whip lights act as clear markers. They help maintain spacing, prevent accidental collisions, and ensure that no vehicle gets left behind, especially when navigating challenging terrains or low-light conditions.
- Compliance with Park Regulations: Many off-road parks, particularly those with sand dunes or extensive trail systems (like Glamis in California), require vehicles to have a lighted whip flag or a whip light for safety reasons, especially during night operations. Installing one ensures you meet these requirements and can enjoy the trails without issue.
- Customization and Style: Beyond safety, whip lights are a fantastic way to express your personality and customize your truck. With a vast array of colors, patterns, and synchronization options, you can create a unique light show that turns heads at truck meets, parades, or even just cruising down the highway (where legal). They add a distinct, futuristic, and often aggressive look to any rig.
- Accident Prevention: By making your truck more noticeable, whip lights can help prevent accidents by alerting others to your presence, especially in areas where other vehicles might not expect a large truck, such as construction sites or remote trails.
Types of Whip Lights: Finding Your Perfect Illumination

Whip lights come in various configurations, each suited for different needs and preferences.
- Standard LED Whips: These are typically single-color or multi-color whips with basic pre-set patterns. They are a good entry-level option for those seeking enhanced visibility without extensive customization.
- RGB/Chasing Whips: The most popular type, these whips feature individually addressable LEDs that allow for a full spectrum of colors and dynamic “chasing” patterns where light appears to move along the whip. They often come with remote controls or smartphone app integration for extensive customization.
- Fiber Optic Whips: While less common for trucks, some whips utilize fiber optic cables to distribute light, offering a unique, diffused glow.
- Heavy-Duty Safety Whips: Designed more for industrial or commercial applications (mining, construction), these whips prioritize durability and maximum visibility. They often feature brighter, solid amber or orange lights and robust construction, sometimes with integrated flags.
- Length Variations: Whips typically range from 2 feet (good for ATVs or where height is restricted) to 8 feet or more (ideal for lifted trucks in open terrain). The choice depends on your vehicle’s height, intended use, and local regulations.
- Mounting Styles:
- Spring Mounts: These are highly recommended for off-roading, as the spring base allows the whip to flex and absorb impacts from branches or sudden movements, preventing breakage.
- Quick-Disconnect Mounts: Ideal for easy removal when not needed, such as for street driving or entering garages with low clearance.
- Fixed Mounts: Simple and sturdy, but offer no flexibility or easy removal.
Choosing the Right Whip Lights for Your Truck

Selecting the ideal whip lights involves considering several factors to ensure they meet your needs and expectations.
- Primary Use:
- Off-Roading/Dunes: Prioritize durability, spring mounts, and bright, highly visible colors/patterns. Consider compliance with park rules.
- Show Truck/Aesthetics: Focus on RGB/chasing features, app control, and the ability to synchronize with other lighting.
- Industrial/Work: Opt for heavy-duty, solid-color (e.g., amber) whips with maximum brightness and robust construction.
- Length: Measure your truck’s height and consider the environment. For lifted trucks in open terrain, taller whips (6-8 ft) are often preferred for maximum visibility. For trails with low-hanging branches, a shorter whip might be more practical.
- Features: Do you want basic solid colors or dynamic, app-controlled chasing patterns? Consider brightness levels (lumens) and the number of LEDs per foot.
- Durability & Weather Resistance: Look for whips with a high IP (Ingress Protection) rating (e.g., IP67 or IP68) to ensure they are waterproof and dustproof, essential for off-road environments. Check the material of the pole and base for robustness.
- Mounting Location: Common spots include the bed rail, roll bar, bumper, or tailgate. Ensure the chosen location provides clear visibility and allows for secure mounting.
- Budget: Whip lights range significantly in price based on features, quality, and brand. Set a realistic budget before you start shopping.
Installation Guide: How to Mount Whip Lights on Your Truck

Installing whip lights is a manageable DIY project for most truck owners, though it requires basic tools and electrical knowledge.
Tools and Materials You Might Need:
- Drill and appropriate drill bits (if mounting directly to body)
- Wrenches or socket set
- Wire strippers and crimpers
- Heat gun (for heat shrink tubing)
- Electrical tape and zip ties
- Heat shrink tubing
- Inline fuse holder and appropriate fuse
- Auxiliary switch (if not using an existing one)
- Dielectric grease
- Wire loom or conduit
Step-by-Step Installation:
- Choose Your Mounting Location:
- Bed Rail: Popular for easy access and good visibility. You might need to drill holes or use existing mounting points.
- Roll Bar/Headache Rack: Provides height and a secure anchor.
- Bumper/Tailgate: Less common but possible, though visibility might be reduced.
- Ensure the location allows the whip to stand freely without obstruction and provides a stable base.
- Mount the Base:
- If drilling, mark and pre-drill pilot holes. Ensure there’s clearance on the underside.
- Secure the whip light base using the provided hardware (bolts, nuts, washers). Use Loctite on threads for added security against vibration.
- If using a quick-disconnect, mount the base first, then attach the whip.
- Run the Wiring:
- Most whip lights come with a power wire (red, positive) and a ground wire (black, negative). RGB whips will also have a controller and often a separate wire for an auxiliary signal (e.g., brake light).
- Route the wires carefully from the whip light base towards your power source (typically the battery or an auxiliary fuse box).
- Crucial: Avoid hot engine components, moving parts, or sharp edges. Use wire loom or conduit to protect the wires from abrasion and the elements. Secure wires with zip ties every 12-18 inches.
- Pass wires through existing grommets in the firewall or use a drill to create a new, sealed pass-through point.
- Connect to Power:
- Positive (+): Connect the positive wire from the whip light (or its controller) to a fused power source. An inline fuse holder is essential to protect your vehicle’s electrical system and the whip light. Connect to the positive terminal of your battery or an auxiliary fuse box.
- Negative (-): Connect the negative wire to a solid ground point on your truck’s chassis or directly to the negative terminal of the battery.
- Switch (Optional but Recommended): For easy control, wire the positive lead through an auxiliary switch in your cabin. This allows you to turn the whip lights on/off independently.
- Controller (for RGB): Mount the control box in a dry, accessible location, often under the dash or seat. Ensure it’s away from extreme heat or moisture.
- Test the Lights: Before buttoning everything up, connect the whip light(s) and test all functions (on/off, color changes, patterns).
- Finalize and Secure:
- Once everything is working, neatly bundle any excess wiring and secure it with zip ties.
- Use heat shrink tubing over all exposed electrical connections to prevent corrosion and shorts.
- Apply dielectric grease to connections for added protection.
Maintenance and Care
Whip lights are designed to be durable, but a little care goes a long way in extending their lifespan.
- Regular Cleaning: Wash the whips with mild soap and water to remove dirt, mud, and road grime. Avoid harsh chemicals that could damage the pole or LEDs.
- Inspect Connections: Periodically check all electrical connections for corrosion, looseness, or damage.
- Check Pole Integrity: Look for cracks, fraying, or stress points, especially near the base.
- Storage: If you remove your whips for street driving or storage, keep them in a safe place where they won’t be bent or damaged. Many come with protective sleeves.
Legal Considerations & Best Practices
While whip lights are fantastic for off-road use, their legality on public roads varies widely by location.
- On-Road Restrictions: In most states and countries, colored lights (red, blue, green, etc.) are restricted on public roads, often reserved for emergency vehicles. Using multi-colored whip lights on a highway can lead to fines or even more serious charges.
- Amber/White Exception: Some jurisdictions may permit amber or white lights, especially if they are not excessively bright or flashing.
- Check Local Laws: Always, always check your local state, county, and city laws regarding aftermarket lighting before driving on public roads with whip lights activated.
- Use Responsibly: Even where legal, avoid using excessively bright or flashing patterns that could distract or blind other drivers.
- Off-Road Parks: Be aware of specific rules at off-road parks or events you plan to attend. Some require specific colors or heights for whips.
Pricing Table for Whip Lights on Truck
| Type of Whip Light | Key Features | Price Range (Per Pair) |
|---|---|---|
| Basic Single Color | Solid color (e.g., white, amber, red), fixed patterns | $50 – $120 |
| Mid-Range RGB | Multiple colors, basic pre-set patterns, remote control | $100 – $250 |
| Premium App-Controlled RGB | Full RGB spectrum, dynamic chasing patterns, Bluetooth app control, music sync, often higher LED density | $200 – $500+ |
| Heavy-Duty Safety Whips | Industrial-grade durability, often solid amber/orange, maximum brightness, sometimes with integrated flag | $150 – $350 |
| Installation Cost | DIY (Free, minus materials) or Professional (varies) | $0 – $200+ |
Note: Prices can vary significantly based on brand, length, features, and specific retailers. This table provides general estimates.
Frequently Asked Questions (FAQ)
Q: Are whip lights legal on public roads?
A: Generally, no. Most states and countries restrict colored lights (red, blue, green) on public roads, reserving them for emergency vehicles. Always check your local laws before using them on highways.
Q: How durable are whip lights?
A: High-quality whip lights are very durable, made from flexible materials like fiberglass or polycarbonate. Spring mounts further enhance their resilience by allowing them to bend and absorb impacts. Look for high IP ratings (IP67/IP68) for water and dust resistance.
Q: Can I install them myself?
A: Yes, if you have basic mechanical skills and a fundamental understanding of automotive electrical wiring. It involves mounting the whip and connecting it to a power source, often with an inline fuse and switch.
Q: What’s the difference between RGB and chasing whips?
A: RGB whips can display a wide range of static colors. Chasing whips (often a feature of advanced RGB whips) have individually addressable LEDs, allowing light patterns to appear to “chase” or flow along the length of the whip, creating dynamic animations.
Q: How do I power whip lights?
A: They typically connect to your truck’s 12V electrical system, usually directly to the battery or an auxiliary fuse box. It’s crucial to use an inline fuse for protection and often an auxiliary switch for control.
Q: Do they drain the battery?
A: While LEDs are energy-efficient, leaving whip lights on for extended periods when the engine is off can drain your battery, especially if you have multiple lights. It’s best to turn them off when not in use.
Q: What length should I get for my truck?
A: Consider your truck’s height and intended use. For lifted trucks in open off-road areas, 6-8 foot whips are common for maximum visibility. For trails with low overhead clearance or smaller vehicles, shorter whips (2-4 ft) might be more suitable.
Conclusion
Whip lights on trucks are more than just a fad; they are a valuable addition for any truck owner seeking to enhance their vehicle’s visibility, improve safety, and inject a significant dose of personalized style. From navigating dusty trails and ensuring your presence is known in a convoy to making a statement at a truck show, the benefits are clear. By understanding the different types, carefully considering your needs, and following proper installation and maintenance procedures, you can unlock the full potential of these vibrant accessories. Remember always to prioritize safety and adhere to local regulations, ensuring that your illuminated truck stands out for all the right reasons.