Wheel Lights on Truck: Illuminating Your Ride with Style and Safety
Wheel Lights on Truck: Illuminating Your Ride with Style and Safety
The roar of a powerful truck engine, the glint of chrome, and the sheer presence on the road – these are defining characteristics of a formidable vehicle. But what if you could add another layer to this commanding aesthetic, one that not only turns heads but also enhances safety and functionality? Enter wheel lights on truck, a dynamic and increasingly popular accessory that illuminates your vehicle’s wheels and undercarriage, transforming its appearance and providing practical benefits.
Wheel lights, often referred to as rock lights, wheel well lights, or underglow kits, are LED lighting systems specifically designed to be mounted around the wheel wells, suspension components, or chassis of a truck. They cast a vibrant glow on the wheels, tires, and the ground beneath, creating a striking visual effect that ranges from subtle elegance to bold, off-road readiness. More than just a flashy upgrade, these lights serve multiple purposes, from boosting nighttime visibility and safety to aiding in off-road navigation and even deterring potential theft. This comprehensive guide will delve into every aspect of wheel lights on trucks, from their various types and installation nuances to legal considerations and practical applications.
The Multifaceted Benefits of Wheel Lights on Trucks
Installing wheel lights on your truck offers a compelling array of advantages that go beyond mere aesthetics:
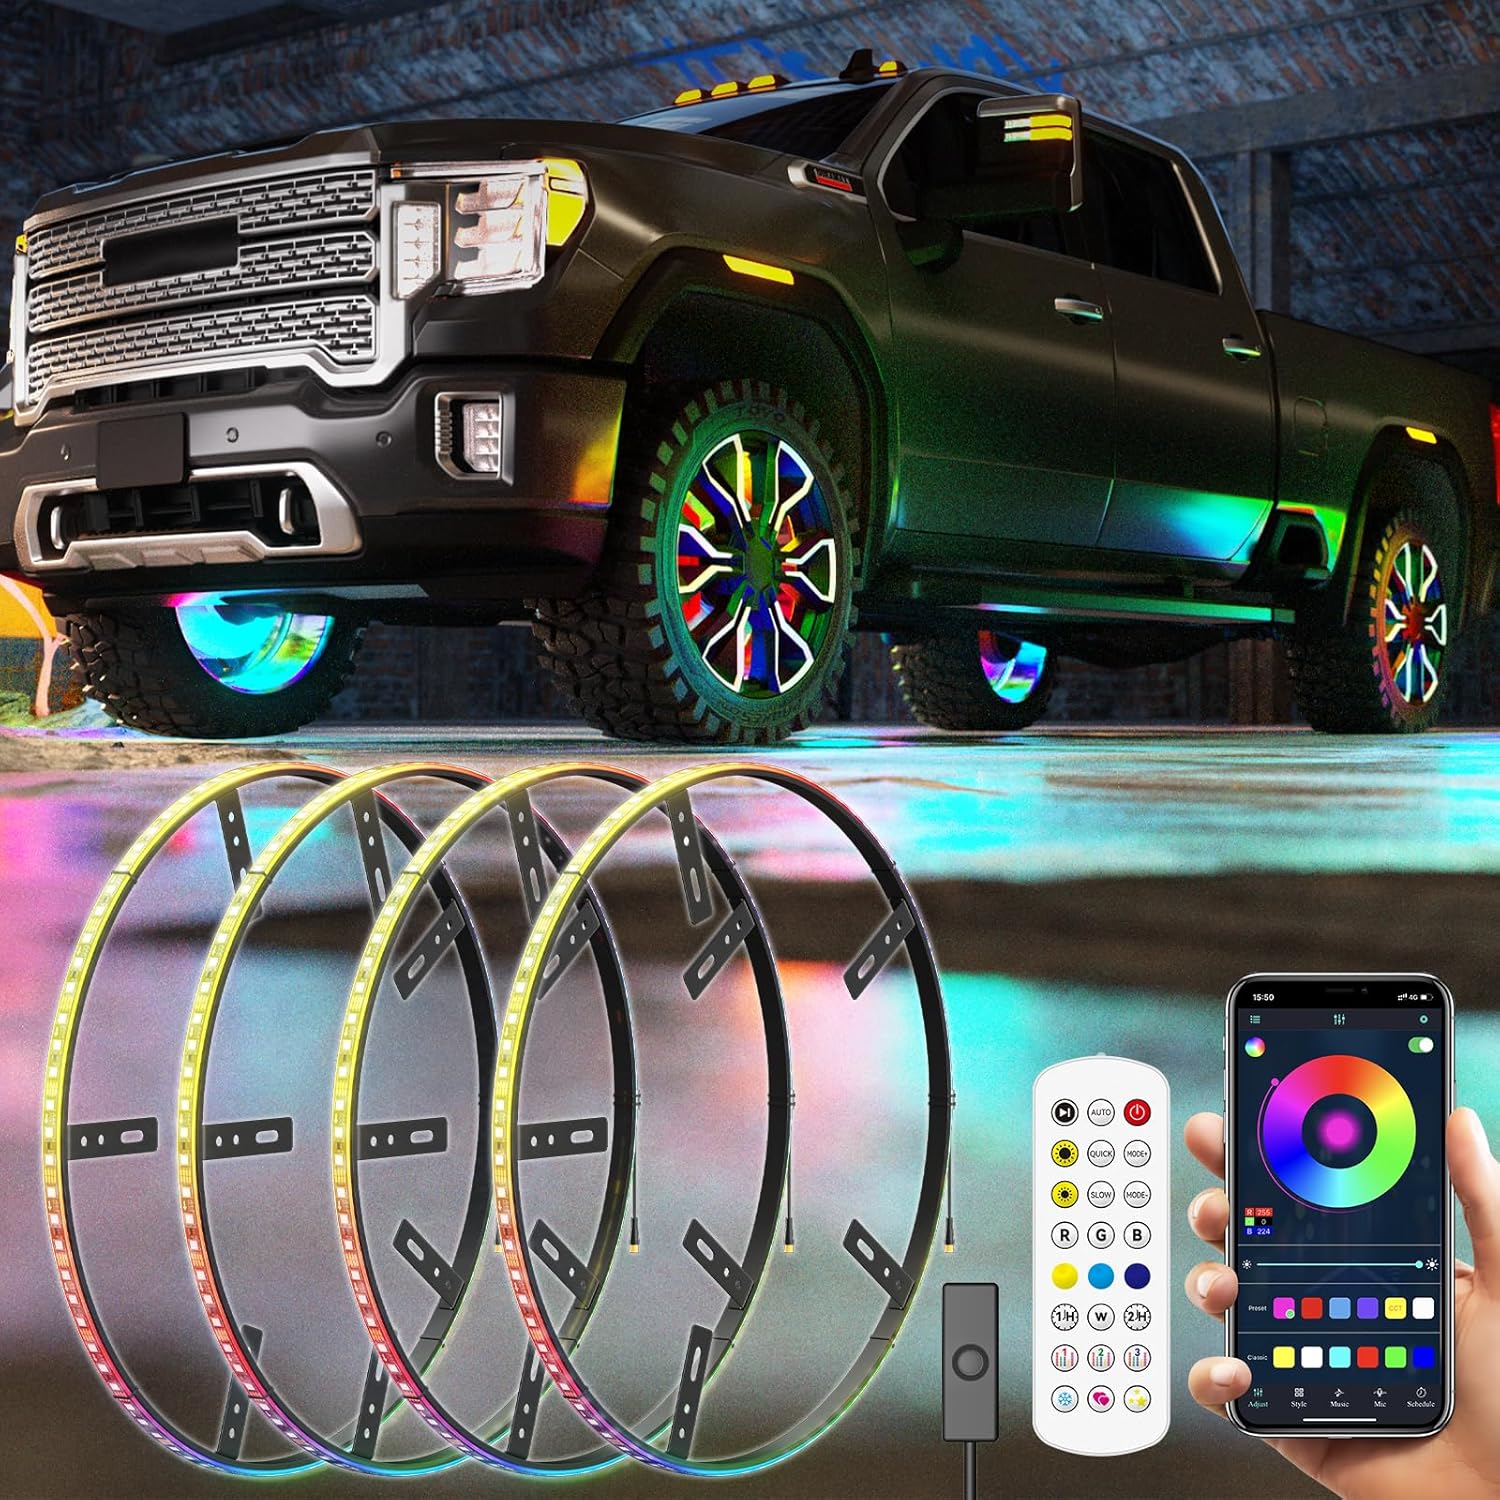
- Enhanced Aesthetics and Customization: This is perhaps the most immediate and noticeable benefit. Wheel lights allow truck owners to express their personality and customize their vehicle’s look. With a vast spectrum of colors, patterns, and brightness levels available, you can create a unique, eye-catching display that makes your truck stand out, whether parked or cruising down the highway. RGB (Red, Green, Blue) kits, in particular, offer millions of color combinations, often controllable via a smartphone app, providing unparalleled personalization.
- Increased Visibility and Safety: While often seen as a cosmetic upgrade, wheel lights significantly improve your truck’s visibility to other drivers, especially at night or in adverse weather conditions. The added illumination around the wheels and undercarriage creates a larger, more discernible silhouette, making your truck easier to spot from a distance or in blind spots. This can reduce the risk of accidents, particularly in parking lots or on poorly lit roads.
- Practicality for Off-Roading and Utility: For truck owners who venture off the beaten path, wheel lights (especially robust rock lights) are invaluable. They illuminate the terrain directly around and beneath the wheels, helping drivers navigate rocky trails, muddy ruts, or dark campsites. This improved visibility prevents damage to the vehicle’s underside, aids in tire placement, and makes it easier to inspect suspension components or tires in low-light conditions.
- Theft Deterrence: A brightly lit truck, especially one with active underglow or wheel lights, can be less appealing to thieves. The increased visibility might make a potential thief think twice, as any suspicious activity would be more easily spotted.
- Vehicle Inspection and Maintenance: Having lights focused on the wheel area can be incredibly useful for routine checks. Whether you’re inspecting tire pressure, looking for leaks, or examining brake components, wheel lights provide the necessary illumination without needing a separate flashlight.
Types and Categories of Wheel Lights for Trucks
The market offers a diverse range of wheel light systems, each designed for specific applications and preferences:
- LED Rock Lights: These are perhaps the most popular choice for trucks, especially those used for off-roading. Rock lights are typically small, robust, and housed in durable, waterproof casings (often aluminum or heavy-duty plastic). They are designed to withstand harsh environments, impacts, and vibrations. They project a powerful, focused beam, making them ideal for illuminating obstacles during off-road excursions or for a strong, localized underglow effect. They come in single colors or RGB options.
- LED Wheel Well / Fender Liner Lights: These are often flexible or rigid LED strips or pods mounted directly within the wheel well arch. They provide a softer, more diffused glow that outlines the wheel opening. They are less exposed to direct impacts than rock lights but still offer excellent aesthetic appeal and improved side visibility.
- LED Underglow Kits: While not strictly "wheel lights," many underglow kits include components designed to illuminate the wheel areas. These kits typically consist of long LED strips mounted along the frame rails and sometimes additional pods for the wheel wells, creating a comprehensive halo effect around the entire truck.
- Wheel Ring Lights: These are circular LED rings designed to mount directly to the brake dust shield behind the wheel, illuminating the entire wheel and tire from within. They create a very distinctive, high-end look, often requiring specific mounting brackets for different wheel sizes.
- Valve Stem Cap Lights: These are small, battery-powered LED caps that screw onto the tire’s valve stem. They light up when the wheel spins, creating a dynamic light circle. While inexpensive and easy to install, their light output is minimal and primarily for novelty.
- Color Options: Lights are available in single colors (e.g., white, amber, blue, red) or multi-color (RGB) variants. RGB kits are highly popular as they allow users to change colors and patterns via a remote control or smartphone app, offering maximum versatility.
A Step-by-Step Guide to Installing Wheel Lights on Your Truck
While professional installation is always an option, many wheel light kits are designed for DIY enthusiasts. Here’s a general guide:
Tools and Materials You Might Need:
- Wheel light kit (with LEDs, wiring harness, control box)
- Wire strippers/crimpers
- Electrical tape or heat-shrink tubing
- Zip ties or cable clamps
- Drill (if using screw-mount lights)
- Wrench/socket set (for removing wheels, if necessary)
- Degreaser/rubbing alcohol
- Clean rags
- Multimeter (for testing power)
- Inline fuse holder and appropriate fuse
Installation Process:
-
Preparation and Planning:
- Safety First: Disconnect the negative terminal of your truck’s battery before starting any electrical work.
- Cleanliness: Thoroughly clean the areas where the lights will be mounted (wheel wells, frame rails) with a degreaser and rubbing alcohol. Adhesion is crucial for long-term durability.
- Layout: Temporarily position the lights to determine the best mounting spots and how to route the wiring. Consider where the control box will be located (usually in the engine bay or under the dashboard).
- Legality Check: Re-read your local and state laws regarding vehicle lighting. This step is critical!
-
Mounting the Lights:
- Adhesive Mounting: For LED strips or pods with pre-applied 3M tape, peel and firmly press them onto the clean surface. For best results, use an adhesion promoter.
- Screw Mounting: For rock lights or pods with mounting brackets, mark the drill points. Drill pilot holes and secure the lights using the provided screws. Ensure screws are not so long they damage anything behind the mounting surface.
- Cable Management: As you mount each light, loosely route the wiring towards the intended location of the control box.
-
Wiring the System:
- Connect to Control Box: Connect the wires from each individual light to the main wiring harness and then to the control box. Ensure all connections are secure and weatherproofed (e.g., with heat-shrink tubing).
- Power Source: Connect the control box’s power wire to a switched 12V power source. This means the lights will only come on when the truck’s ignition is on (or a specific accessory switch is engaged). An "add-a-circuit" fuse tap is an excellent way to safely draw power from your truck’s fuse box without cutting into factory wiring. Always use an inline fuse appropriate for the kit’s power draw.
- Grounding: Connect the control box’s ground wire to a clean, unpainted metal surface on the truck’s chassis or a factory ground point. A poor ground connection is a common cause of electrical issues.
- Cable Routing: Neatly route all wiring, securing it with zip ties or cable clamps. Avoid routing wires near hot engine components, moving parts, or sharp edges that could chafe the insulation. Use wire loom or conduit for added protection, especially in exposed areas.
-
Control Box Setup:
- Mount the control box in a secure, dry location (e.g., under the hood, away from direct engine heat and moisture).
- If your kit uses a remote control or smartphone app, follow the manufacturer’s instructions for pairing.
-
Testing and Finalization:
- Reconnect the negative battery terminal.
- Test all the lights and functions (color changes, patterns, brightness).
- Once everything is working correctly, double-check all connections, ensuring they are tight and secure. Trim any excess wiring and tidy up the installation.
Important Considerations Before and After Installation
Before you dive into the world of wheel lights, it’s crucial to be aware of several key factors:
- Legality and Local Regulations: This is paramount. Laws regarding vehicle lighting vary significantly by state, county, and even city. Many jurisdictions have strict rules about the color of lights visible from the front or rear of a vehicle.
- Red and Blue Lights: In most places, red lights visible from the front and blue lights (especially flashing ones) are strictly reserved for emergency vehicles (police, fire, ambulance). Using these colors can lead to hefty fines, impoundment, or even arrest.
- Flashing Lights: Flashing or strobing lights are often restricted to emergency or warning vehicles.
- Brightness: Some areas may have limits on the overall brightness or intensity of aftermarket lights to prevent dazzling other drivers.
- General Rule: White and amber are generally the safest colors for aftermarket lighting visible from the front or side. If your kit has RGB capabilities, ensure you can easily switch off or change to a legal color when driving on public roads. Always check your local Department of Motor Vehicles (DMV) or state highway patrol website for specific regulations.
- Durability and Weatherproofing (IP Rating): Trucks operate in demanding environments. Look for lights with a high IP (Ingress Protection) rating, such as IP67 or IP68, indicating they are fully dust-tight and resistant to water immersion. This ensures longevity against rain, mud, snow, and pressure washing.
- Power Consumption: While modern LED lights are energy-efficient, a large kit with many lights can still draw significant power. Ensure your truck’s electrical system can handle the added load without draining the battery, especially if the lights are left on when the engine is off. Proper wiring and fusing are essential.
- Quality of Components: Invest in a reputable brand. Cheap kits may use low-quality LEDs that dim quickly, inferior wiring that corrodes, or unreliable control boxes. Look for reviews and warranties.
- Maintenance: Periodically check wiring for wear, corrosion, or loose connections. Clean the lights regularly to maintain brightness and prevent dirt buildup from obscuring the light output.
Tips for Choosing and Using Wheel Lights
- Define Your Purpose: Are you looking for subtle accent lighting, extreme off-road visibility, or a show-stopping display? Your purpose will dictate the type, brightness, and number of lights you need.
- Research Brands and Reviews: Don’t just pick the cheapest option. Read user reviews, watch installation videos, and compare features from well-known manufacturers.
- Consider Installation Complexity: If you’re a DIY novice, start with simpler kits. If you’re comfortable with electrical work, a more complex system with custom routing might be achievable.
- Less Can Be More: While it’s tempting to go all out, sometimes a tasteful, well-placed set of lights has more impact than an overwhelming display.
- Proper Wire Management: This cannot be stressed enough. Neatly routed and secured wires prevent damage, short circuits, and a messy appearance.
Potential Challenges and Solutions
- Challenge: Wiring Issues (Flickering, Not Working): Often due to loose connections, corroded terminals, or inadequate grounding.
- Solution: Ensure all connections are crimped or soldered securely. Use dielectric grease on exposed terminals. Find a clean, unpainted metal surface for grounding. Test with a multimeter.
- Challenge: Battery Drain: Lights left on for too long or improper wiring can drain the truck’s battery.
- Solution: Wire the lights to a switched power source (accessory fuse) so they turn off with the ignition. Consider a separate switch or a timer if you want them on while parked. Use efficient LED lights.
- Challenge: Damage from Road Debris/Off-Roading: Exposed lights can be hit by rocks, branches, or water.
- Solution: Choose highly durable, impact-resistant lights (like rock lights) with high IP ratings. Mount them in protected areas within the wheel well or behind frame components where possible.
- Challenge: Legality Fines: Operating illegal light colors or patterns on public roads.
- Solution: Always research and comply with local laws. If your kit has RGB, ensure you can quickly switch to legal colors (white/amber) or turn them off when driving. Save the wild colors for private property, car shows, or off-road trails.
Price Table: Wheel Lights for Trucks
| Light Type | Typical Price Range (Kit) | Key Features & Considerations
