 Trucks for Sale Find the best deals on used trucks for sale across the USA. Browse pickups, semi trucks, dump trucks and more – updated daily
The Ultimate Guide to Truck Light Bars: Illuminating Your Adventures
In the realm of truck accessories, few additions offer the blend of practicality, safety, and rugged aesthetics as effectively as a light bar. Far more than just an extra light, a light bar for truck is a powerful auxiliary lighting system designed to dramatically enhance visibility, particularly in low-light conditions, off-road environments, or during adverse weather. For truck owners, whether they’re avid off-roaders, dedicated professionals, or simply commuters seeking better nighttime vision, a high-quality light bar transforms the driving experience, turning dark, uncertain paths into clearly illuminated roadways or trails. This comprehensive guide will delve into everything you need to know about truck light bars, from understanding their benefits and types to mastering installation and maintenance.
Why You Need a Light Bar: Benefits Beyond Illumination
A light bar for your truck isn’t merely about adding more light; it’s about expanding your capabilities and ensuring safety. The advantages are manifold:
- Enhanced Visibility & Safety: The primary benefit is vastly improved illumination. Standard headlights often fall short in providing adequate light spread or distance, especially on unlit roads, in rural areas, or during heavy rain, fog, or snow. A light bar cuts through darkness, revealing obstacles, wildlife, and road hazards far in advance, significantly reducing the risk of accidents.
- Off-Roading & Trail Navigation: For the adventurous spirit, a light bar is indispensable. Navigating rugged terrain, dense forests, or rocky trails after dusk demands maximum visibility. Spot and flood beam patterns combine to illuminate both the immediate surroundings and distant obstacles, making challenging off-road expeditions safer and more enjoyable.
- Work Site Illumination: Professionals in construction, agriculture, emergency services, or those who frequently work outdoors at night find light bars invaluable. They provide a broad, powerful light source, turning a dark worksite into a well-lit operational area, enhancing productivity and safety for tasks like loading, unloading, or repairs.
- Aesthetics & Customization: Beyond their functional benefits, light bars lend an undeniably aggressive and capable look to any truck. They are a popular aesthetic upgrade, allowing owners to personalize their vehicle’s appearance while simultaneously boosting its utility.
- Increased Situational Awareness: By illuminating a wider and deeper field of vision, light bars help drivers react more quickly to unexpected situations, whether it’s an animal darting across the road or a sudden change in terrain.
Types of Light Bars for Trucks: Choosing Your Beam
Light bars come in various configurations, each designed to meet specific needs. Understanding these types is crucial for making an informed decision.
By Beam Pattern:
- Spot Beam: Concentrates light into a narrow, focused beam that projects far into the distance. Ideal for high-speed driving, spotting distant objects, or long-range illumination.
- Flood Beam: Disperses light over a wide area but with less intensity and distance. Excellent for illuminating immediate surroundings, worksites, or slow-speed off-roading where peripheral vision is key.
- Combo Beam: Integrates both spot and flood LEDs, offering the best of both worlds. Spot beams in the center provide long-range visibility, while flood beams on the outer edges illuminate the periphery. This is the most popular and versatile choice for general use.
By LED Type:
- CREE LEDs: Known for their high efficiency, brightness, and durability. Often considered a premium choice.
- OSRAM LEDs: Another high-quality option, often found in European-designed light bars, offering excellent performance.
- COB (Chip-on-Board) LEDs: Provide a more uniform light output with less glare, often used for flood applications.
By Size and Shape:
- Single-Row: Thinner and more discreet, ideal for fitting into tighter spaces or for those seeking a less prominent look.
- Dual-Row: The most common type, offering maximum light output due to a double stack of LEDs.
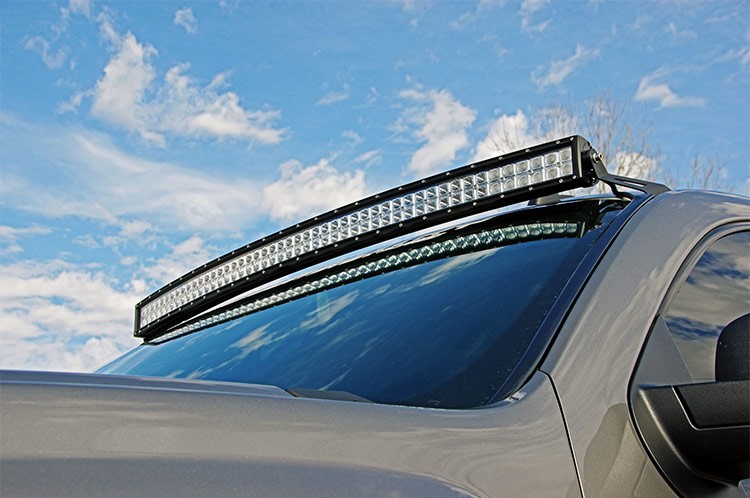
- Curved Light Bars: Designed to follow the contour of a vehicle’s roof or bumper, providing a wider spread of light that helps illuminate the ditch on either side of the road.
- Straight Light Bars: The traditional design, offering powerful, focused illumination.
- Pod Lights/Cubes: Smaller, square or round lights often sold in pairs. Highly versatile, they can be mounted on A-pillars, bumpers, or used as reverse lights, offering concentrated light in specific areas.
By Housing Material and Durability:
- Aluminum Housing: Most light bars feature robust aluminum housing for heat dissipation and durability.
- IP Ratings (Ingress Protection): Indicates the light bar’s resistance to dust and water. An IP67 rating means it’s fully dust-tight and can withstand immersion in water up to 1 meter for 30 minutes. IP68 offers even greater protection.
Key Considerations Before Buying: Making the Right Choice
Selecting the perfect light bar for truck requires careful thought. Here’s what to consider:
- Brightness (Lumens/Watts): Lumens measure total light output, while watts indicate power consumption. More lumens generally mean brighter light, but also higher power draw. Consider your needs: a work truck might benefit from maximum lumens, while a casual off-roader might prioritize a balance.
- Beam Pattern: As discussed, choose based on your primary use. A combo beam is often the best all-around choice.
- Size & Mounting Location: Light bars range from 6 inches to over 50 inches. Common mounting spots include:
- Roof: Offers the highest vantage point for maximum light spread, but can create wind noise and glare on the hood.
- Grille/Bumper: Lower profile, less wind noise, but limited by the height of the vehicle.
- A-Pillar/Ditch Lights: Smaller pod lights mounted near the windshield for focused side illumination.
- Under Bumper/Hidden: More discreet options.
- Durability & IP Rating: If you anticipate harsh conditions (mud, water, dust), an IP67 or IP68 rating is essential for longevity. Look for shatterproof lenses (e.g., polycarbonate).
- Power Consumption & Wiring: A large light bar can draw significant power. Ensure your truck’s electrical system can handle the load. You’ll need appropriate gauge wiring, a relay, and a fuse.
- Legal Regulations: This is crucial. Many states/countries have laws governing auxiliary lighting, including maximum height, number of lights, and whether they can be used on public roads. Often, light bars must be covered or switched off when on public highways. Always check your local Department of Motor Vehicles (DMV) or equivalent regulations.
- Brand Reputation & Warranty: Invest in a reputable brand. They typically offer better quality components, more accurate lumen ratings, and a reliable warranty.
Installation Guide: Getting Your Light Bar Mounted and Wired
While professional installation is always an option, many truck owners can install a light bar themselves with basic tools and some patience.
Tools Required:
- Wrench set (metric/standard)
- Screwdriver set
- Wire strippers/crimpers
- Drill (if new holes are needed for mounting)
- Heat shrink tubing or electrical tape
- Multimeter (optional, but helpful for testing)
- Zip ties
- Safety glasses and gloves
Mounting Options & Steps:
- Choose Your Mount:
- Roof Mounts: Typically vehicle-specific brackets that attach to the door jambs or roof rails. Ensure a watertight seal.
- Bumper/Grille Mounts: Often universal brackets that attach to existing bumper bolts or a bull bar/grille guard.
- Hidden Mounts: Some kits allow mounting inside the bumper or grille for a stealthier look.
- Test Fit: Before drilling or final tightening, test fit the light bar and brackets to ensure proper alignment and clearance.
- Secure Mounting: Mount the light bar firmly using the provided hardware. Ensure it’s level and aimed correctly.
Wiring Diagram & Steps:
A standard light bar wiring setup involves a relay for safety and efficiency.
- Disconnect Battery: ALWAYS disconnect the negative terminal of your truck’s battery before starting any electrical work.
- Mount the Relay: Find a secure, dry spot in the engine bay, close to the battery.
- Connect Power to Relay (Pin 30): Run an appropriately gauged wire (e.g., 10-12 AWG for most light bars) from the positive terminal of your battery, through an inline fuse (rated slightly higher than the light bar’s amp draw), to Pin 30 on the relay.
- Connect Light Bar to Relay (Pin 87): Run a wire from Pin 87 on the relay directly to the positive wire of your light bar.
- Connect Ground Wires: Connect the negative wire of the light bar to a good chassis ground point on your truck. Also, connect Pin 85 of the relay to a good chassis ground.
- Connect Switch to Relay (Pin 86):
- Run a wire from Pin 86 on the relay into the cabin.
- Connect this wire to one terminal of your ON/OFF switch.
- Connect the other terminal of the switch to an "ignition-switched" 12V power source (meaning it only gets power when the ignition is on). This prevents accidentally leaving the light bar on and draining your battery. A fuse tap can be useful here.
- Route Wires: Neatly route all wires, securing them with zip ties away from moving parts or hot components. Use grommets when passing wires through the firewall to prevent chafing.
- Weatherproof Connections: Use heat shrink tubing or high-quality electrical tape on all exposed wire connections to protect against moisture and corrosion.
- Reconnect Battery & Test: Reconnect the battery. Test the light bar thoroughly to ensure it functions correctly and the switch operates as intended.
Safety Precautions:
- Always use an inline fuse appropriate for the light bar’s current draw.
- Ensure all connections are tight and secure.
- Never work on electrical systems with the battery connected.
- Wear appropriate safety gear.
Maintenance & Longevity: Keeping Your Light Bar Shining Bright
A light bar is an investment. Proper care ensures it lasts for years.
- Regular Cleaning: Wash your light bar regularly, especially after off-roading or exposure to salt and grime. Use mild soap and water, avoiding harsh chemicals that can damage the lens or finish.
- Check Connections: Periodically inspect all wiring connections for corrosion, looseness, or damage. Tighten as needed.
- Inspect for Damage: Look for cracks in the lens, bent fins, or compromised seals. Address any damage promptly to prevent water ingress.
- Address Moisture/Condensation: While rare in quality light bars, if you notice condensation inside the lens, it indicates a compromised seal. Contact the manufacturer or attempt to reseal it if you’re experienced.
- Troubleshooting Common Issues:
- Light Bar Not Turning On: Check fuse, relay, switch, and ground connections. Use a multimeter to trace power.
- Flickering/Dimming: Could be a loose connection, inadequate grounding, or voltage drop due to thin wiring.
Practical Advice and Actionable Insights
- Don’t Skimp on Wiring: Use appropriate gauge wire and a high-quality wiring harness with a relay and fuse. This is critical for safety and performance.
- Research Local Laws: Before purchasing, understand your state or country’s regulations regarding auxiliary lights. Ignorance is not an excuse for a ticket.
- Consider Future Needs: If you think you might upgrade your truck’s accessories, plan your wiring now to accommodate future additions.
- Test Before Final Mounting: Before making anything permanent, connect the light bar to a temporary power source to ensure it works.
- Fuse Appropriately: The fuse protects your wiring and vehicle’s electrical system from overcurrents. Never use a fuse with a higher rating than recommended.
Sample Price Table for Light Bars for Trucks
Please note: Prices for light bars can vary significantly based on brand reputation, LED quality, lumen output, IP rating, and warranty. The following table provides illustrative price ranges and specifications for common types of light bars as of late 2023 / early 2024. These are estimates and should be used for general comparison only.
| Light Bar Type | Approx. Length (inches) | Approx. Lumens | Approx. Watts | Beam Pattern | IP Rating | Price Range (USD) | Key Features / Notes |
|---|---|---|---|---|---|---|---|
| Small Pod/Cube Light | 3-5 | 1,000-3,000 | 15-40 | Spot/Flood | IP67/IP68 | $20 – $80 | Versatile for A-pillars, reverse, or accent lighting. |
| 20" Single Row | 20 | 4,000-8,000 | 60-120 | Combo | IP67 | $70 – $180 | Slim profile, good for bumper or grille mounting. |
| 20" Dual Row (Straight) | 20 | 8,000-15,000 | 120-200 | Combo | IP67/IP68 | $100 – $300 | Popular size, excellent all-around performance. |
| 32" Dual Row (Straight) | 32 | 12,000-22,000 | 180-300 | Combo | IP67/IP68 | $150 – $450 | More powerful, often mounted on roof or larger bumpers. |
| 42" Dual Row (Curved) | 42 | 18,000-30,000 | 240-450 | Combo | IP67/IP68 | $200 – $600 | Wider light spread, follows windshield contour. |
| 50" Dual Row (Straight) | 50 | 25,000-40,000+ | 300-600+ | Combo | IP67/IP68 | $250 – $800+ | Maximum output, typically roof-mounted for large trucks. |
| Premium Brands | Various | Highest | Highest | Various | IP68 | $500 – $1500+ | Top-tier components, best warranties, extreme durability. |
Frequently Asked Questions (FAQ)
Q: Are light bars legal for road use?
A: Generally, no. Most states and countries prohibit the use of auxiliary off-road lights, including light bars, on public roads. They are typically for off-road or private property use only. Always check your local regulations; some require them to be covered when on public roads.
Q: How many lumens do I need for my light bar?
A: It depends on your primary use. For general off-roading or work, 8,000-15,000 lumens is a good starting point. For extreme visibility or long-range spotting, 20,000+ lumens might be desired. Balance lumens with power consumption and your truck’s electrical capacity.
Q: Can I install a light bar myself?
A: Yes, many light bars are designed for DIY installation. If you have basic mechanical and electrical knowledge, along with the right tools, it’s a manageable project. However, if you’re unsure, professional installation is recommended.
Q: What’s the difference between a spot beam and a flood beam?
A: A spot beam is narrow and focused, projecting light far into the distance. A flood beam is wide and diffused, illuminating a broad area close to the vehicle. A combo beam combines both for versatile illumination.
Q: Do light bars drain the battery?
A: Yes, if left on for extended periods without the engine running, a light bar can drain your battery, especially larger, high-wattage units. Always wire your light bar through a relay connected to an ignition-switched power source to prevent accidental discharge.
Q: How do I choose the right size light bar for my truck?
A: Consider your mounting location (bumper, grille, roof) and the available space. Measure the area carefully. Also, consider the aesthetic balance – a very large light bar might overwhelm a smaller truck, while a small one might look out of place on a large truck.
Conclusion
A light bar for truck is more than just an accessory; it’s a significant upgrade that enhances safety, extends your truck’s capabilities, and adds a rugged, purposeful aesthetic. From illuminating the darkest trails and work sites to providing crucial visibility in challenging weather, the benefits are undeniable. By understanding the different types, considering key factors like brightness and beam pattern, and ensuring a correct, safe installation, you can equip your truck with the perfect lighting solution. Choose wisely, install confidently, and prepare to illuminate your adventures like never before.