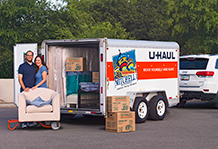
The Road Ahead: A Comprehensive Guide to U-Haul Hitch Installers

The Road Ahead: A Comprehensive Guide to U-Haul Hitch Installers
Towing a trailer, whether for moving, hauling recreational vehicles, or transporting equipment, opens up a world of possibilities. But before you can hit the road with confidence, your vehicle needs a sturdy and properly installed hitch. While many options exist, U-Haul has long stood as a prominent name in the towing industry, offering comprehensive hitch installation services across North America. This article delves into the world of U-Haul hitch installers, providing a detailed guide on what to expect, why it matters, and how to ensure your towing setup is safe and reliable.
What is a U-Haul Hitch Installer?
A U-Haul hitch installer is a trained technician at a U-Haul Moving & Storage Center or authorized dealer who specializes in fitting and securing trailer hitches and associated wiring to a wide range of vehicles. This service goes beyond merely bolting on a piece of metal; it involves selecting the correct hitch for your specific vehicle and towing needs, ensuring proper electrical connections for trailer lights, and often making minor modifications to the vehicle for a perfect fit. Their expertise is crucial for safe towing, as an improperly installed hitch can lead to catastrophic failure, endangering both the driver and others on the road.
Why Choose U-Haul for Hitch Installation?
Choosing a professional for hitch installation is paramount, and U-Haul offers several compelling reasons to consider their services:
- Expertise and Experience: U-Haul has been in the towing business for decades. Their technicians undergo specialized training to handle various vehicle types and hitch configurations, ensuring a professional and safe installation.
- Nationwide Network: With thousands of locations across the U.S. and Canada, U-Haul offers unparalleled accessibility. This means you can often find a convenient installation center nearby, and their standardized procedures ensure consistent quality regardless of location.
- Wide Selection of Hitches: U-Haul stocks a vast inventory of hitches from leading manufacturers, catering to different vehicle makes and models, and various towing capacities (Class I to Class V). This ensures you get the right hitch for your specific needs.
- Comprehensive Service: Beyond the hitch itself, U-Haul installers also handle the necessary electrical wiring for trailer lights (4-way or 7-way connectors), brake controllers, and offer accessories like ball mounts, hitch balls, and weight distribution systems.
- Warranty and Support: U-Haul often provides a warranty on their hitch installations, offering peace of mind. Their customer service is also readily available to address any post-installation questions or concerns.
- Competitive Pricing: While quality is a priority, U-Haul aims to offer competitive pricing, making professional hitch installation accessible to a broader audience.
The U-Haul Hitch Installation Process: A Step-by-Step Guide
Understanding the installation process can help you feel more prepared and confident in the service you receive.
-
Consultation and Vehicle Assessment:
- When you arrive, a U-Haul technician will discuss your specific towing needs (what you plan to tow, its weight) and assess your vehicle.
- They will verify your vehicle’s make, model, year, and trim level to determine its maximum towing capacity and the appropriate hitch class.
- They’ll also check for any pre-existing conditions that might affect the installation (e.g., rust, damaged frame).
-
Hitch Selection:
- Based on the assessment, the technician will recommend the correct receiver hitch class (e.g., Class III for most mid-size trucks/SUVs) that matches your vehicle’s capacity and your towing requirements.
- They will show you the specific hitch model designed for your vehicle, explaining its features.
-
Wiring Harness Installation:
- For trailer lights to function, a wiring harness must be installed and connected to your vehicle’s electrical system. This can be a simple plug-and-play operation for newer vehicles or require more intricate splicing for older models.
- U-Haul installers are proficient in installing both 4-way (basic lights) and 7-way (lights, brakes, auxiliary power) connectors.
-
Mounting the Hitch:
- The vehicle is typically lifted, and the installation area (usually the frame under the rear bumper) is prepped. This might involve removing a fascia, heat shields, or existing bumper bolts.
- The hitch is then bolted securely to the vehicle’s frame using specialized hardware. In some cases, drilling new holes may be necessary, but U-Haul prioritizes "no-drill" installations where possible.
- All bolts are torqued to manufacturer specifications to ensure maximum safety and stability.
-
Testing and Final Checks:
- Once the hitch is mounted and the wiring is connected, the technician will thoroughly test all trailer light functions (running lights, brake lights, turn signals) using a diagnostic tool.
- They will double-check all connections, bolt tightness, and ensure there’s no interference with other vehicle components.
-
Customer Education:
- Finally, the technician will walk you through the installed hitch, explaining its features, proper use, and maintenance tips.
- They will advise on tongue weight, gross trailer weight, and the importance of never exceeding your vehicle’s or hitch’s capacity.
Types of Hitches and Their Applications
Understanding hitch classes is crucial for safe towing:
- Class I (Light Duty): Up to 2,000 lbs GTW (Gross Trailer Weight), 200 lbs TW (Tongue Weight). Ideal for small cars towing bike racks, small utility trailers. Uses a 1-1/4" receiver.
- Class II (Medium Duty): Up to 3,500 lbs GTW, 350 lbs TW. Suitable for compact SUVs and crossovers towing small boats or pop-up campers. Uses a 1-1/4" receiver.
- Class III (Heavy Duty): Up to 8,000 lbs GTW, 800 lbs TW. The most common class for full-size SUVs, trucks, and vans, capable of towing larger boats, travel trailers, and car haulers. Uses a 2" receiver.
- Class IV (Extra Heavy Duty): Up to 10,000 lbs GTW, 1,000 lbs TW. For heavy-duty trucks and SUVs towing very large trailers. Uses a 2" receiver.
- Class V (Super Heavy Duty): 10,000+ lbs GTW, 1,200+ lbs TW. Designed for commercial trucks and specialized heavy hauling. Uses a 2" or 2-1/2" receiver.
U-Haul primarily focuses on receiver hitches (Class I-V) for light to heavy-duty towing applications. They also offer weight distribution systems for heavier trailers, which help distribute the trailer’s tongue weight more evenly across the tow vehicle’s axles, improving stability and handling.
Important Considerations Before Installation
Before heading to U-Haul, keep these points in mind:
- Vehicle Towing Capacity: This is the most critical factor. Consult your vehicle’s owner’s manual to find its maximum towing capacity. Never exceed this limit.
- Trailer Weight: Know the Gross Trailer Weight (GTW) and Tongue Weight (TW) of the heaviest trailer you plan to tow. This dictates the required hitch class.
- Electrical Needs: Do you need basic trailer lights (4-way flat connector) or do you also require electric brakes, auxiliary power, or reverse lights (7-way round connector)?
- Vehicle Warranty: While a professionally installed hitch should not void your vehicle’s warranty, it’s wise to check your owner’s manual or consult your dealership if you have concerns, especially regarding electrical modifications.
- State and Local Regulations: Be aware of any specific towing laws in your area, such as requirements for trailer brakes or safety chains.
- Existing Bumper/Fascia: Some vehicles may require minor trimming of the bumper or fascia for the hitch to fit. The U-Haul technician will inform you if this is necessary.
DIY vs. Professional Installation
While online tutorials and hitch kits are available for DIY enthusiasts, professional installation by U-Haul offers distinct advantages:
- Safety: The paramount concern. Professional installers ensure the hitch is correctly sized, securely mounted, and properly wired, significantly reducing the risk of towing accidents.
- Correct Tools and Expertise: Hitch installation often requires specialized tools (e.g., torque wrenches, drill bits, wire crimpers) and knowledge of vehicle-specific mounting points and electrical systems.
- Time-Saving: Professionals can typically complete an installation much faster than an inexperienced DIYer, usually within 1-3 hours.
- Peace of Mind: Knowing your hitch was installed by trained experts provides confidence and reduces worry on the road.
- Warranty: Professional installations often come with a warranty on parts and labor, which DIY setups lack.
Tips for a Smooth Hitch Installation Experience
- Do Your Homework: Know your vehicle’s exact make, model, year, and trim, as well as its factory towing capacity.
- Define Your Needs: Be clear about what you plan to tow and its approximate weight. This helps the technician recommend the right hitch.
- Schedule an Appointment: While walk-ins are sometimes accommodated, scheduling an appointment ensures dedicated service and minimizes wait times.
- Ask Questions: Don’t hesitate to ask the technician about the process, the hitch they recommend, and any concerns you have.
- Inspect the Work: Before leaving, visually inspect the installed hitch. Ensure it looks securely mounted and the wiring is neatly tucked away. Test the trailer lights with the technician if possible.
Potential Challenges and Solutions
- Compatibility Issues: Not all vehicles are designed for towing, or certain models may have limited hitch options. U-Haul’s system helps identify compatible hitches, and technicians can advise on alternatives or limitations.
- Electrical Problems: Modern vehicles have complex electrical systems. Improper wiring can cause issues with trailer lights or even vehicle diagnostics. U-Haul technicians are trained to integrate wiring seamlessly, often using vehicle-specific harness kits.
- Rust/Corrosion: Older vehicles may have rust on the frame, making bolt removal or new drilling difficult. Technicians are equipped to handle these situations, sometimes requiring additional time or specialized tools.
- Unexpected Costs: While U-Haul provides quotes, sometimes unforeseen issues (e.g., extensive rust, need for bumper trimming) can arise. Clarify potential additional costs upfront.
U-Haul Hitch Installation Price Table (Estimated Ranges)
Please note that these are estimated ranges and actual prices can vary significantly based on your specific vehicle, the hitch class required, the complexity of the wiring, regional labor rates, and current promotions. It is always best to get a direct quote from your local U-Haul center.
| Service Component | Estimated Price Range (USD) | Description | The U-Haul towing package includes the actual hitch, which connects to the vehicle’s frame.

