


Rock Lights for Truck: Illuminating Your Off-Road Adventures
For truck enthusiasts, especially those who dare to venture off the beaten path, visibility is paramount. While headlights illuminate the road ahead, the terrain directly beneath and around your vehicle often remains shrouded in darkness. This is where rock lights for trucks come into play. More than just an aesthetic accessory, these powerful, low-mounted LED lights are an indispensable tool for enhancing safety, preventing damage, and elevating the overall off-road experience.
This comprehensive guide will delve deep into the world of rock lights, exploring their purpose, benefits, types, installation, and everything you need to know to make an informed decision for your rig.
What Are Rock Lights?
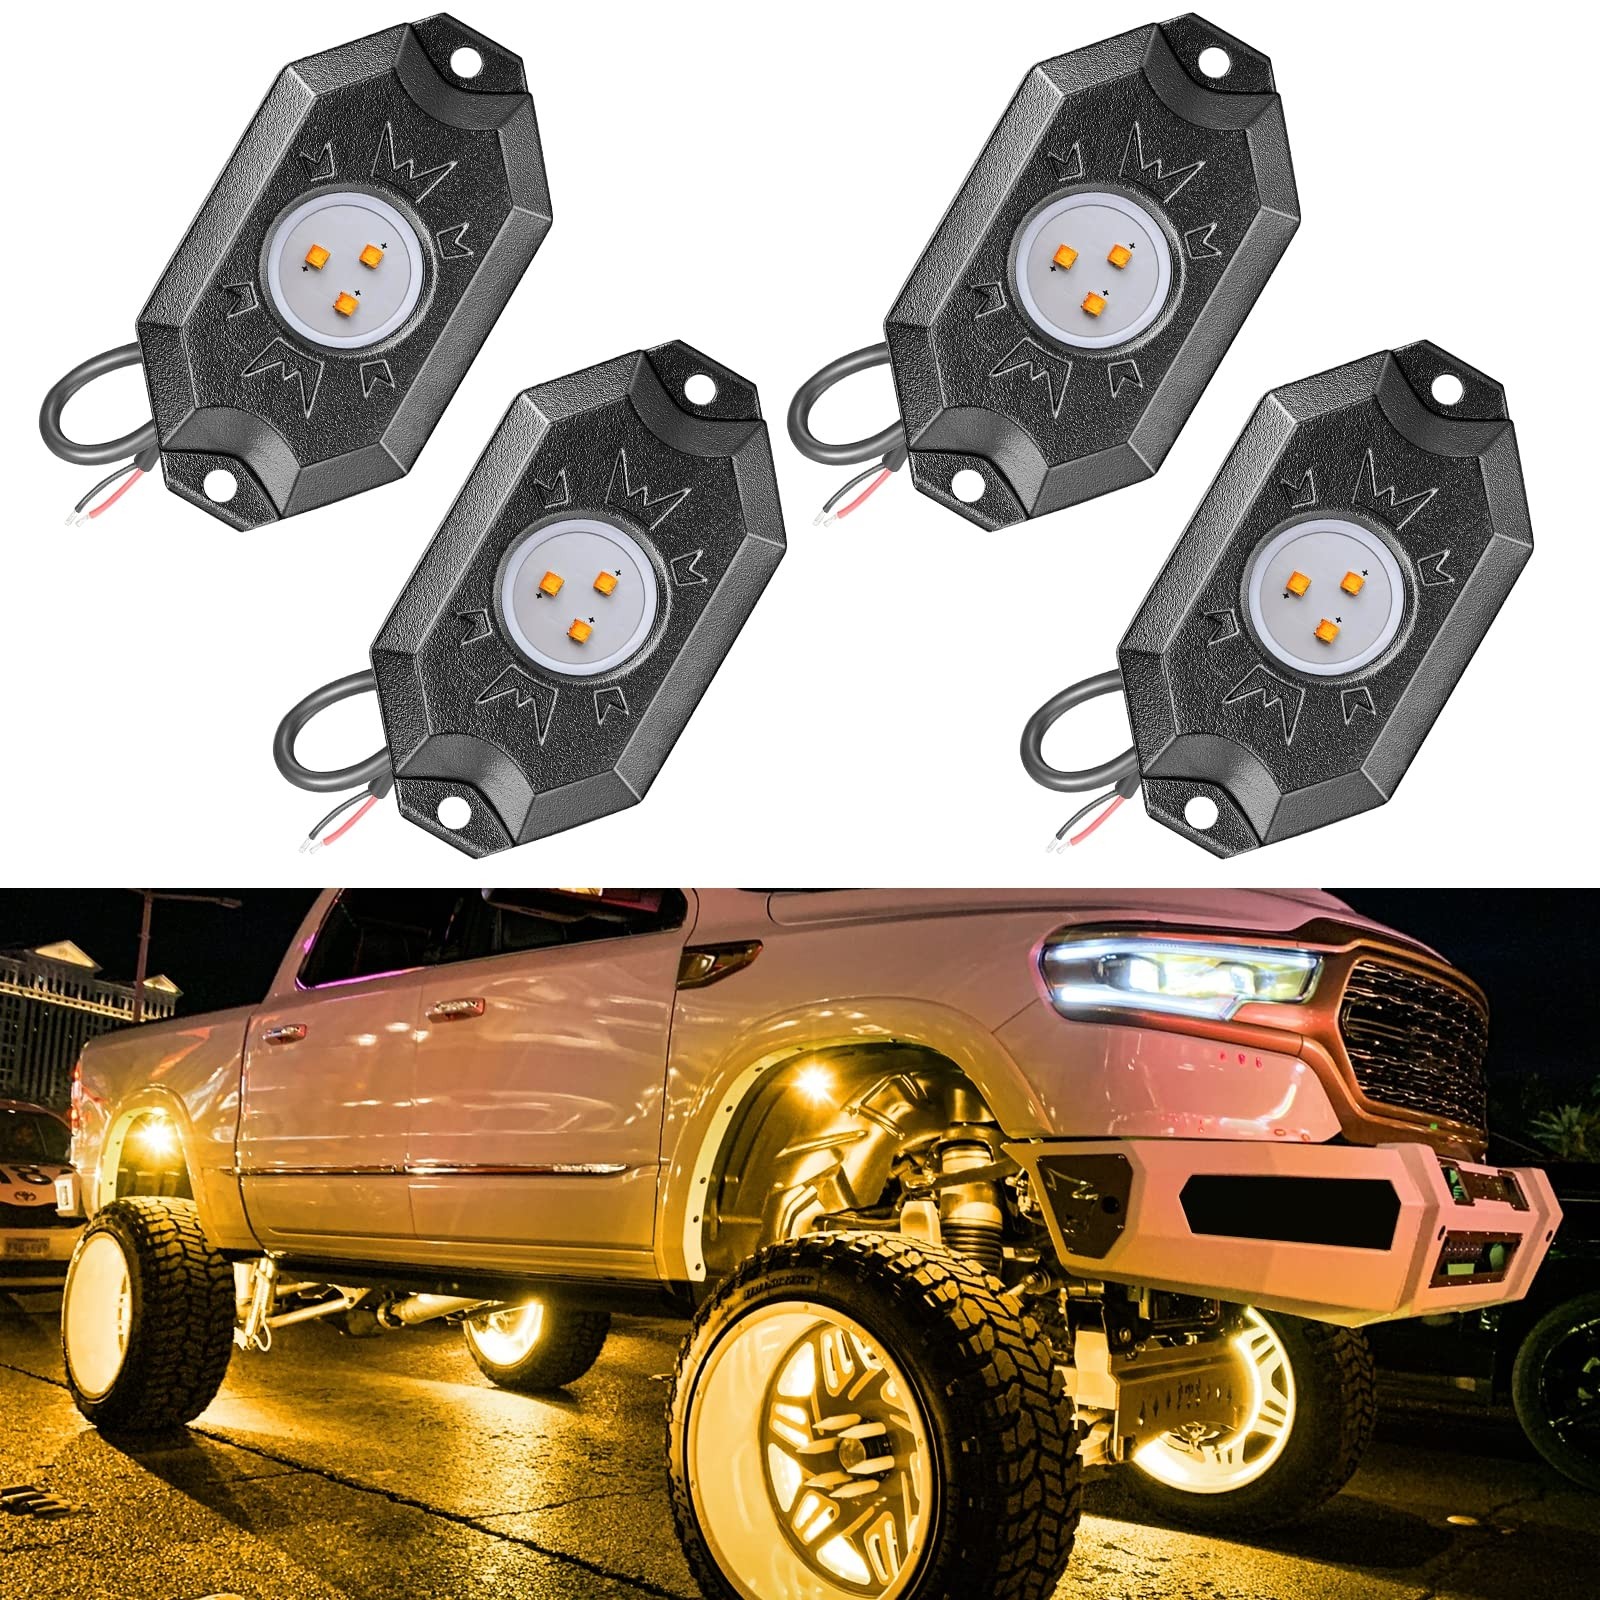
Rock lights, also known as underglow lights or undercarriage lights, are compact, robust LED lighting units designed to be mounted to the chassis, wheel wells, and frame of a truck or off-road vehicle. Their primary function is to cast a wide, bright beam of light directly onto the ground surrounding the vehicle, illuminating obstacles, terrain features, and the immediate path of your tires. Unlike traditional forward-facing lights, rock lights focus on the often-overlooked undercarriage, providing crucial visibility when navigating challenging environments like rocky trails, muddy ruts, or dark campsites.
Why Do You Need Rock Lights? The Benefits Unveiled
The advantages of installing rock lights extend far beyond mere aesthetics. They offer a multitude of practical benefits for any truck owner, particularly those engaged in off-roading:
- Enhanced Visibility & Safety: The most significant benefit is improved visibility during nighttime or low-light conditions. Rock lights illuminate rocks, logs, ditches, and other obstacles that might otherwise be invisible, preventing costly damage to your vehicle’s underside, suspension, and drivetrain components. This also aids in safer spotting for fellow off-roaders.
- Damage Prevention: By clearly revealing the terrain, rock lights allow you to choose optimal tire placement, avoiding sharp rocks, deep ruts, or hidden roots that could puncture tires, bend axles, or scrape the undercarriage. This proactive approach saves on potential repair costs and keeps your truck in prime condition.
- Aesthetics & Style: Let’s be honest, rock lights look cool. They add a custom, aggressive, and highly visible flair to your truck, especially when utilizing RGB (color-changing) options. This can make your vehicle stand out at events or simply add a personalized touch.
- Practicality Beyond Off-Roading:
- Campsite Illumination: They can double as convenient area lighting around your campsite, making it easier to set up camp, cook, or move around safely after dark.
- Vehicle Maintenance: Need to work under your truck in the dark? Rock lights provide ample illumination for inspections, repairs, or recovery operations.
- Recovery Operations: If your vehicle gets stuck, rock lights can illuminate the recovery points, winching area, or the terrain requiring traction aids, making the recovery process safer and more efficient.
Types of Rock Lights
Rock lights come in various forms, each with its own characteristics:
- LED Pods: These are typically small, square or round units containing multiple high-intensity LEDs. They are incredibly durable, often encased in aluminum housings, and designed to withstand harsh impacts and elements. Pods offer focused illumination and are ideal for critical areas like wheel wells and frame rails.
- LED Strips/Bars: Less common for direct rock illumination, but sometimes used for broader undercarriage glow or accent lighting. They offer more diffuse light and are generally less impact-resistant than pods.
- Color Options:
- White/Amber: Standard and highly effective for pure visibility. Amber can be beneficial in dusty or foggy conditions as it creates less glare.
- RGB (Color-Changing): These lights allow you to change the color via a remote or smartphone app. While less practical for pure off-road navigation, they offer immense customization for show and aesthetics. Many RGB kits also include a pure white mode for functional use.
- Wired vs. Wireless/Bluetooth Control: Most rock light kits are wired, connecting to a central control box. Many modern kits, especially RGB ones, offer Bluetooth connectivity, allowing you to control colors, patterns, and brightness directly from your smartphone. Simple white light kits often use a physical switch.
Key Features & Considerations When Buying
Choosing the right rock lights involves evaluating several factors to ensure they meet your specific needs and the demands of your adventures:
- Brightness (Lumens): More lumens generally mean brighter light. For serious off-roading, look for lights with high lumen output per pod to ensure adequate illumination.
- Durability (IP Rating & Housing Material): This is crucial. Rock lights are exposed to water, mud, dust, and impacts.
- IP Rating: Look for an IP67 or IP68 rating, signifying complete dust protection and resistance to immersion in water.
- Housing: Die-cast aluminum housings are preferred for their heat dissipation and resistance to physical damage.
- Lens: Polycarbonate lenses are more shatter-resistant than glass.
- Beam Pattern: Most rock lights offer a wide, flood-style beam to cover a broad area. Some might have a slightly more focused spot beam, but for undercarriage illumination, a flood is generally superior.
- Mounting Options: Ensure the kit comes with robust mounting hardware, often including rubber pads for vibration dampening. Some designs are magnetic, while others require drilling.
- Wiring & Power Draw: Consider the gauge of the wiring provided and the total power draw to ensure your vehicle’s electrical system can handle it. Most kits are designed to be low-draw.
- Control Options: Decide between a simple on/off switch, a dedicated remote control, or a Bluetooth app for color-changing features.
- Brand Reputation & Warranty: Invest in reputable brands known for quality and customer support. A good warranty provides peace of mind.
Installation Guide: Lighting Up Your Undercarriage
Installing rock lights is a manageable DIY project for most truck owners, though it requires patience and attention to detail.
Tools You’ll Likely Need:
- Drill and various drill bits
- Wire strippers/crimpers
- Heat gun (for heat shrink tubing)
- Zip ties and cable clamps
- Socket set/wrenches
- Multimeter (for testing power)
- Safety glasses and gloves
Step-by-Step Installation:
- Plan Your Placement: This is critical. Jack up your truck or use a lift to gain access. Strategically place lights in wheel wells (one per corner), along frame rails (front, middle, rear), and potentially near the transfer case or differential. Aim for even coverage, avoiding areas prone to direct impact.
- Tip: Use painter’s tape to temporarily hold lights in place and visualize the light spread before drilling.
- Mount the Lights:
- Mark your drilling locations carefully.
- Drill pilot holes, then enlarge to the appropriate size for your mounting bolts.
- Securely fasten each light using the provided hardware. Ensure they are tight but don’t overtighten, especially on plastic components. Use rubber grommets or washers if provided to reduce vibration.
- Route the Wiring:
- Start from each light and route the wires towards your chosen control box/power source location (often near the battery or firewall).
- Crucial: Route wires away from hot exhaust components, moving suspension parts, sharp edges, and pinch points.
- Use plenty of zip ties and cable clamps to secure the wires tightly to the frame or existing wiring harnesses. Leave a little slack where wires might flex (e.g., near suspension).
- Consider using split loom tubing or electrical tape for added protection against abrasion and elements.
- Connect to the Control Box (if applicable):
- Most kits come with a central control box where all individual light wires connect. Follow the manufacturer’s diagram carefully.
- Ensure all connections are secure and weatherproof (e.g., using heat shrink connectors).
- Connect to Power:
- Run the main power wire from the control box (or directly from the switch if it’s a simple setup) to your truck’s battery or a fused accessory power source in the fuse box.
- Always install an inline fuse as close to the power source as possible to protect your vehicle’s electrical system and the lights. The fuse rating should match the kit’s requirements.
- Connect the ground wire to a clean, unpainted metal surface on the chassis.
- Install the Switch/Controller:
- Decide where you want the switch (inside the cab, on the dash, or in an auxiliary switch panel).
- Wire the switch according to the kit’s instructions. If using a Bluetooth controller, ensure it’s mounted in a secure, accessible location.
- Test Everything:
- Before tidying up all the wiring, connect the battery and test all lights. Ensure they illuminate correctly and respond to the switch/controller.
- Check for any loose connections or flickering lights.
- Finalize Wiring:
- Once everything works, go back and meticulously secure all wires with zip ties, ensuring a clean and professional installation. Cut off excess zip tie ends.
Maintenance & Troubleshooting
Rock lights are built tough, but a little care goes a long way:
- Cleaning: Periodically clean the lenses of your rock lights to ensure maximum brightness. Mud and grime can significantly reduce light output.
- Checking Connections: After off-road trips, inspect all wiring and connections for signs of wear, fraying, or loosening due to vibrations and impacts.
- Troubleshooting:
- Lights not working: Check the fuse first. Then, verify all power and ground connections.
- Flickering lights: Often indicates a loose connection or insufficient power.
- Only some lights working: Check individual connections to the control box or individual ground wires.
Legal Considerations
While rock lights are fantastic for off-road use, be aware of local laws regarding auxiliary lighting on public roads. Many jurisdictions restrict the use of certain colored lights (e.g., red, blue) or any auxiliary lights when driving on public highways. Always check your local regulations to avoid fines. Generally, it’s best practice to turn off rock lights when on paved roads, unless they are white and only used as functional utility lighting.
Practical Advice for Rock Light Enthusiasts
- Don’t Skimp on Quality: Cheap lights often mean dim output, poor durability, and unreliable wiring. Invest in a reputable brand for longevity and performance.
- Plan Your Layout Carefully: Before drilling, visualize the light spread. A balanced setup provides the best illumination.
- Protect Your Wiring: This is the most common point of failure. Use split loom, zip ties, and secure mounting to prevent abrasion and snagging.
- Consider Your Primary Use: If you’re purely aesthetic, RGB is fun. If you’re a serious off-roader, prioritize brightness and durability in white/amber.
- Future-Proof: If you plan other electrical accessories, consider a dedicated fuse block for a cleaner and more expandable setup.
Price Table: Rock Lights for Truck
| Category / Type | Key Features | Typical Price Range (USD) | Notes |
|---|---|---|---|
| Budget White Pods | 4-8 small LED pods, basic wiring, IP67, simple on/off switch | $50 – $100 | Good for basic illumination; durability may vary. |
| Mid-Range White Pods | 8-12 larger LED pods, higher lumens, IP68, durable aluminum housing, better wiring | $100 – $250 | Excellent balance of performance and value. |
| Premium White Pods | 8-16 high-output LED pods, top-tier IP68, military-grade housing, advanced thermal management | $250 – $500+ | Max brightness & durability for extreme conditions. |
| Budget RGB Pods | 4-8 small RGB LED pods, basic app/remote control, IP67 | $80 – $150 | Entry-level for color customization. |
| Mid-Range RGB Pods | 8-12 RGB LED pods, brighter output, IP68, robust housing, advanced app features | $150 – $350 | Popular choice for good performance and color options. |
| Premium RGB Pods | 12-16+ high-output RGBW (white dedicated) pods, IP68, extreme durability, advanced app control, music sync | $350 – $700+ | Best for those wanting maximum brightness and customization. |
| LED Strips (Accent) | Flexible LED strips, lower light output, often RGB, less impact resistant | $30 – $100 | Primarily for aesthetic underglow, not functional rock lighting. |
| Installation Services | Professional installation labor cost | $200 – $600+ | Varies greatly by shop and complexity of install. |
Note: Prices are estimates and can vary based on brand, specific features, number of lights in a kit, and retailer sales.
Frequently Asked Questions (FAQ)
Q1: How many rock lights do I need for my truck?
A1: For optimal coverage, most full-size trucks benefit from 8-12 rock lights. A common setup is one in each wheel well (4), two along each frame rail (4), and potentially two more near the front and rear bumpers or transfer case. Smaller trucks might get by with 6-8.
Q2: Are rock lights legal on public roads?
A2: Generally, rock lights should be turned off when driving on public roads. Many states and localities have laws restricting auxiliary lighting, especially colored lights (red, blue are almost always illegal). White or amber lights might be permissible as utility lights if they don’t cause glare, but it’s best to check your local vehicle code.
Q3: Can I install rock lights myself?
A3: Yes, installing rock lights is a common DIY project. With basic tools, patience, and adherence to the manufacturer’s instructions, most truck owners can complete the installation. Proper wiring and securing are key to a reliable setup.
Q4: Do rock lights drain the truck’s battery?
A4: Modern LED rock lights are very energy-efficient and draw minimal power. If installed correctly with an inline fuse and connected to a switched power source, they will not drain your battery when the truck is off. If connected directly to the battery, ensure you turn them off when not in use.
Q5: What’s the best color for rock lights?
A5: For purely functional off-road visibility, white is the most effective color as it provides true color rendition of the terrain. Amber can be useful in dusty or foggy conditions as it reduces glare. RGB (color-changing) lights are popular for aesthetics, but always switch to white for serious trail navigation.
Q6: How durable are rock lights really?
A6: High-quality rock lights are extremely durable. They are designed to withstand impacts, vibrations, water, mud, and extreme temperatures. Look for lights with an IP68 waterproof rating, robust die-cast aluminum housings, and shatter-resistant polycarbonate lenses for the best longevity.
Conclusion
Rock lights for trucks are far more than just a flashy accessory; they are a vital enhancement for anyone serious about off-roading, overlanding, or simply wanting to add an extra layer of utility and style to their vehicle. By providing critical illumination of the undercarriage, they empower drivers to navigate challenging terrain with greater confidence, prevent costly damage, and elevate the entire outdoor experience. With the right selection, careful installation, and a little maintenance, your rock lights will serve as faithful guides, lighting the path to countless adventures.
