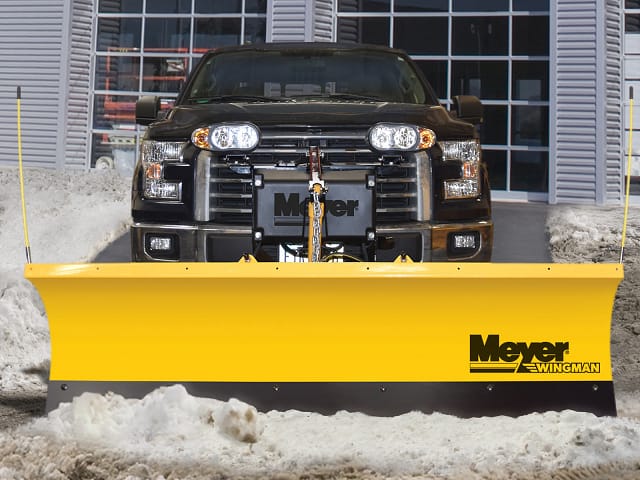
Step-by-Step Guide: Installing a V Plow on Your Truck
V Plow on Your Truck – Equipping your truck with a V plow can transform it into a powerful snow-clearing machine. Proper installation is critical to ensure efficiency and safety. This detailed guide provides a step-by-step approach to installing a V plow on your truck. Follow these instructions carefully for optimal results.
Why Choose a V Plow for Your Truck?
A V plow offers superior snow-clearing performance due to its unique adjustable blade design. Its versatility allows you to handle different snow depths and terrains with ease, making it ideal for both commercial and residential applications. Before diving into the installation process, ensure you have the correct plow model compatible with your truck.
Tools and Materials Needed
Before starting, gather the following tools and materials for a seamless installation:
- V Plow Kit (including mounting brackets, control system, and hydraulic components)
- Socket and wrench set
- Screwdrivers
- Torque wrench
- Drill and drill bits
- Jack and Jack stands
- Electrical tape
- Protective gloves and safety goggles
Ensure you also have the manufacturer’s manual for specific details related to your plow and truck model.
Step 1: Prepare Your Truck
- Inspect Your Truck: Check your vehicle’s front suspension and bumper for any damage or signs of wear. Ensure the front end can handle the weight of the V plow.
- Install a Suspension Upgrade (if necessary): If your truck’s front suspension isn’t strong enough, consider installing heavy-duty springs or a leveling kit.
- Clean the Front Mounting Area: Remove dirt, debris, and rust from the mounting surface to ensure a secure fit for the brackets.
Step 2: Install the Mounting Brackets
- Position the Brackets: Align the mounting brackets provided in the plow kit to the pre-drilled holes on your truck’s frame. Use the manual to confirm their placement.
- Drill Additional Holes (if needed): If your truck lacks pre-drilled holes, use a drill to create the necessary openings. Ensure precise measurements for proper alignment.
- Secure the Brackets: Attach the brackets using bolts and lock washers from the kit. Use a torque wrench to tighten them to the manufacturer’s specified torque settings.
Step 3: Attach the V Plow
- Position the Plow: Place the V plow near the truck’s front and align it with the mounting brackets. Use a jack to lift the plow if necessary.
- Secure the Plow to the Brackets: Insert the connecting pins through the plow and bracket holes. Ensure they are fully engaged and lock them in place with cotter pins.
- Check for Free Movement: Ensure the plow pivots smoothly without binding or excessive play.
Step 4: Connect the Hydraulic System
- Locate Hydraulic Ports: Identify the hydraulic connection points on the plow and truck.
- Attach Hydraulic Lines: Connect the hydraulic hoses to the corresponding ports. Tighten the fittings securely to prevent leaks.
- Fill with Hydraulic Fluid: Add the recommended hydraulic fluid to the reservoir. Check the system for leaks and address any issues immediately.
- Test Hydraulic Functions: Use the control system to raise, lower, and angle the plow. Confirm that all movements are smooth and responsive.
Step 5: Install the Electrical System
- Mount the Control System: Secure the plow control system inside your truck’s cabin. Ensure it is easily accessible while driving.
- Run Electrical Wires: Route the wiring harness from the control system to the plow. Use electrical tape to secure the wires and protect them from damage.
- Connect to the Truck’s Battery: Attach the power wires to the positive and negative terminals of your truck’s battery. Use fuses to protect the system from electrical surges.
- Test the System: Turn on the control system and operate the plow. Ensure the electrical connections are functioning correctly.
Step 6: Adjust and Test the V Plow
- Check Blade Alignment: Ensure the plow blades are parallel to the ground when in the lowered position. Adjust the mounting brackets if needed.
- Test Plow Operation: Drive your truck in a safe area and test the plow’s ability to clear snow. Make sure the blade angles and hydraulic functions perform as expected.
- Inspect for Loose Components: After the test, recheck all bolts, pins, and connections to ensure they remain secure.
Maintenance Tips for Longevity
To keep your V plow in peak condition:
- Regularly inspect for wear and tear.
- Lubricate moving parts as per the manufacturer’s recommendations.
- Check and replace hydraulic fluid annually.
- Tighten all bolts and connections periodically.
- Store the plow in a dry, protected area when not in use.
Conclusion
Installing a V plow on your truck is a valuable upgrade that enhances your snow-clearing capabilities. By following this detailed step-by-step guide, you can ensure a secure and efficient installation. Always refer to the manufacturer’s instructions for specific guidance related to your equipment.


