Illuminating the Path Behind: A Comprehensive Guide to Backup Lights for Trucks
Illuminating the Path Behind: A Comprehensive Guide to Backup Lights for Trucks
Navigating a large truck in reverse can be one of the most challenging aspects of driving, whether you’re backing into a tight loading dock, maneuvering a trailer, or simply parking in a crowded lot. Standard factory-installed backup lights, while legally compliant, often fall short of providing the necessary illumination for optimal safety and confidence. This is where dedicated backup lights for trucks come into play, transforming a risky maneuver into a well-lit, controlled operation. These auxiliary lighting solutions are not just an upgrade; they are a vital safety enhancement for any truck owner or operator, offering improved visibility for the driver and increased awareness for those around the vehicle.
This comprehensive guide will delve into every aspect of backup lights for trucks, from their fundamental purpose and various types to installation best practices, crucial considerations, and maintenance tips, ensuring you have all the information needed to make an informed decision and enhance your truck’s rearward illumination.
The Crucial Role of Enhanced Backup Lights for Trucks
Backup lights, also known as reverse lights, serve a dual purpose: they illuminate the area behind the vehicle for the driver and signal to others that the vehicle is moving backward or is about to. For trucks, especially those frequently used for towing, off-roading, or commercial purposes, the standard white lights integrated into the taillight assembly are often inadequate.
Why are enhanced backup lights so important for trucks?
- Superior Visibility for the Driver: Trucks inherently have larger blind spots. Brighter, wider-beaming backup lights cut through darkness, fog, or heavy rain, allowing the driver to clearly see obstacles, curbs, trailer hitches, and potential hazards that would otherwise remain hidden. This drastically reduces the risk of collisions with objects, property, or other vehicles.
- Increased Safety for Pedestrians and Property: A brightly lit rear warns pedestrians, cyclists, and other drivers of the truck’s reverse movement, especially in low-light conditions or busy environments like construction sites, warehouses, or campgrounds. This proactive warning can prevent serious accidents.
- Aiding in Trailer Hook-up and Maneuvering: For truck owners who frequently tow, powerful backup lights are indispensable. They illuminate the trailer hitch, allowing for precise alignment, and light up the sides of a trailer during turns, making nighttime hook-ups and complex maneuvers significantly easier and safer.
- Enhanced Productivity and Efficiency: In commercial settings, improved visibility means faster and safer backing into docks or job sites, reducing downtime and increasing overall efficiency.
- Legal Compliance and Beyond: While factory lights meet minimum legal requirements, supplemental backup lights, when properly installed and used, can exceed these standards, providing a level of safety and functionality far beyond the bare minimum.
Investing in robust backup lights for your truck is an investment in safety, convenience, and peace of mind.
Types of Backup Lights for Trucks: A Luminary Lineup
The market offers a wide array of backup light options, each with distinct characteristics regarding brightness, efficiency, durability, and cost. Understanding these types is crucial for selecting the best fit for your truck and needs.
-
OEM Replacement Bulbs (LED Upgrades):
- Description: These are direct replacements for your truck’s factory incandescent reverse bulbs, typically upgraded to LED technology.
- Pros: Easiest and cheapest upgrade; no wiring modifications needed; brighter than incandescent.
- Cons: Limited in brightness compared to auxiliary lights; beam pattern is fixed by the OEM housing; may trigger "bulb out" warnings on some vehicles without load resistors.
- Best For: Drivers seeking a modest brightness increase without complex installation.
-
Auxiliary LED Pods/Cubes:
- Description: Compact, powerful LED lights, usually square or rectangular, designed for supplemental illumination. They come in various sizes (e.g., 2×2, 3×3 inches) and lumen outputs.
- Pros: Extremely bright and efficient; long lifespan (50,000+ hours); durable (often IP67/68 rated for water/dust resistance); instant-on; wide range of beam patterns (flood, spot, combo).
- Cons: Higher initial cost than replacement bulbs; requires wiring and mounting.
- Best For: The most popular choice for significant rearward illumination, offering versatility and robust performance.
-
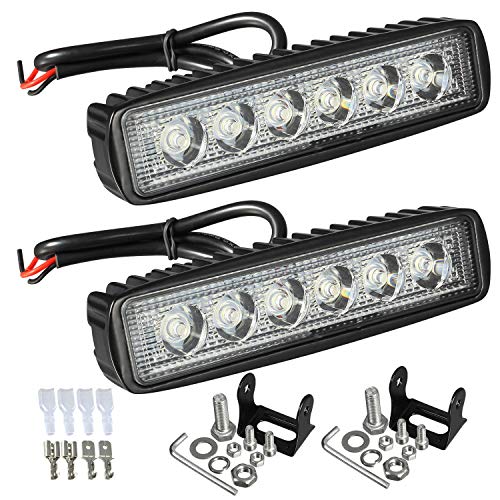
Auxiliary LED Light Bars:
- Description: Longer, linear arrays of LED lights, ranging from a few inches to several feet in length. They offer immense light output.
- Pros: Unmatched brightness for wide areas; can combine multiple beam patterns; robust and durable.
- Cons: More expensive; larger footprint requires specific mounting locations (e.g., bumper, hitch, undercarriage); may be overkill for simple parking needs.
- Best For: Heavy-duty applications, off-roading, or commercial trucks requiring maximum rear illumination.
-
Halogen Auxiliary Lights:
- Description: Traditional bulb-based lights that produce light by heating a filament.
- Pros: Very inexpensive; warm light color (some prefer it).
- Cons: Less bright than LEDs; higher power draw; generate significant heat; shorter lifespan; more susceptible to vibration damage.
- Best For: Budget-conscious buyers, though increasingly uncommon for new installations due to LED’s advantages.
-
HID (High-Intensity Discharge) Auxiliary Lights:
- Description: Use a gas-discharge lamp to produce light, similar to modern car headlights.
- Pros: Very bright, often brighter than most LEDs.
- Cons: High initial cost; require a ballast for operation; slow warm-up time; can be complex to install; may produce excessive glare if not aimed properly.
- Best For: Niche applications where extreme brightness is paramount, though LEDs have largely surpassed them in convenience and efficiency for backup applications.
Key Considerations When Choosing Backup Lights
Selecting the right backup lights involves more than just picking the brightest option. Several factors must align with your truck’s specific needs and your usage patterns.
- Brightness (Lumens): This is the most straightforward measure of light output. For auxiliary backup lights, aim for a minimum of 1,000-2,000 lumens per light. For serious off-road or commercial use, 3,000-5,000+ lumens per light or light bar can be beneficial. Remember that higher lumens also mean more power draw and potentially more glare if not properly aimed.
- Beam Pattern:
- Flood: Spreads light widely over a large, close-up area. Ideal for general backing, illuminating a wide path, or working behind the truck.
- Spot: Concentrates light into a narrow, focused beam, providing illumination further down the path. Useful for long trailers or seeing distant obstacles.
- Combo: Combines both flood and spot elements for versatility. Often found in light bars.
- Recommendation: For backup lights, a flood or wide-angle flood pattern is generally most effective as it covers the immediate area where hazards are most likely to be.
- Durability and IP Rating: Your backup lights will be exposed to the elements. Look for a high IP (Ingress Protection) rating, such as IP67 or IP68, which indicates strong resistance to dust and water immersion. Robust housing materials (e.g., die-cast aluminum) and shatterproof lenses (e.g., polycarbonate) are also crucial.
- Power Consumption: LEDs are very efficient, but powerful auxiliary lights still draw current. Ensure your truck’s electrical system can handle the added load. For high-lumen lights, a dedicated wiring harness with a relay is essential to protect your truck’s wiring.
- Mounting Options: Consider where you plan to mount the lights. Common locations include:
- Rear Bumper: Popular for pods/cubes, provides good ground clearance.
- Hitch Receiver: Specialized mounts can attach lights to the hitch, convenient but may obstruct hitch use.
- Undercarriage/Frame: Discrete, but may require custom brackets.
- Headache Rack/Bed Rail: Provides higher illumination, good for long trailers.
- Flush Mount: Integrates lights seamlessly into bumpers or body panels for a clean look.
- Legal Compliance: Ensure your chosen lights are white (not red, amber, or blue) and are wired to only activate when the vehicle is in reverse. Some jurisdictions have limits on the number or brightness of auxiliary lights on public roads. Always check local regulations.
Installation Guide: Illuminating Your Truck’s Rear
Installing auxiliary backup lights can range from simple plug-and-play to more involved wiring. For optimal performance and safety, a dedicated wiring setup is often recommended.
Tools and Materials You Might Need:
- Wire strippers/crimpers
- Electrical tape/heat shrink tubing
- Multimeter
- Wire connectors (butt connectors, ring terminals)
- Mounting hardware (bolts, nuts, washers)
- Drill and bits (if drilling mounting holes)
- Zip ties for cable management
- Crucially: A Wiring Harness with a Relay!
General Installation Steps:
- Safety First: Disconnect your truck’s negative battery terminal to prevent accidental shorts.
- Mount the Lights: Securely attach your backup lights to your chosen location (bumper, hitch, etc.) using the provided hardware or custom brackets. Ensure they are aimed correctly (slightly downwards to illuminate the ground behind the truck, not blind others).
- Identify the Reverse Light Wire: Locate your truck’s factory reverse light wire. This wire provides the "trigger" signal for your new lights. You can usually find it in the tail light harness. Use a multimeter to confirm it only gets 12V when the truck is in reverse (ignition on, engine off, parking brake engaged).
- Wiring with a Relay (Recommended for high-power lights):
- Power Source: Run a fused positive wire directly from your truck’s battery to terminal 30 on the relay. Use an appropriately sized fuse (e.g., 15-30A) close to the battery.
- Ground: Connect terminal 85 on the relay to a good chassis ground.
- Trigger Wire: Connect the identified factory reverse light wire to terminal 86 on the relay. This tells the relay to switch on when reverse is engaged.
- Output to Lights: Connect terminal 87 on the relay to the positive wire of your new backup lights.
- Light Ground: Connect the negative wire of your new backup lights to a good chassis ground.
- Wiring without a Relay (For low-power lights or LED replacements):
- Simply tap into the factory reverse light wires directly (positive to positive, negative to negative). Be cautious not to overload the factory circuit.
- Secure and Protect Wiring: Route all wiring neatly away from moving parts, hot components, and sharp edges. Use zip ties or cable clamps to secure it. Protect connections with heat shrink tubing or electrical tape.
- Test the Lights: Reconnect the battery. Put the truck in reverse (with the engine off and parking brake on). Verify that the new backup lights illuminate. Check the beam pattern and adjust aiming if necessary.
- Final Checks: Ensure all connections are secure, and there are no loose wires.
Practical Advice: If you’re uncomfortable with electrical work, consider professional installation. Improper wiring can damage your truck’s electrical system or create fire hazards.
Maintenance and Troubleshooting
Backup lights, especially LEDs, require minimal maintenance.
- Regular Cleaning: Keep the lenses clean from dirt, mud, and snow to ensure maximum light output.
- Connection Checks: Periodically inspect wiring connections for corrosion or looseness, especially after off-roading or heavy rain.
- Troubleshooting:
- Lights not turning on: Check the fuse, wiring connections, and ensure the reverse trigger wire is receiving power. Test the lights directly to a 12V source.
- Flickering lights: Could indicate a loose connection, inadequate ground, or a faulty relay.
- Dim lights: Lenses may be dirty, or there might be a voltage drop due to undersized wiring or poor connections.
Practical Tips for Maximizing Backup Light Performance
- Pair with a Backup Camera: While lights illuminate, a camera provides a direct visual. The two work synergistically for unparalleled rear visibility.
- Consider a "Work Light" Function: Many auxiliary lights can be wired with a separate switch in the cab, allowing them to be turned on manually even when not in reverse. This is invaluable for illuminating campsites, work areas, or loading zones at night.
- Aiming is Key: Don’t aim your lights too high, as this can blind drivers behind you. Aim them slightly downward to illuminate the ground directly behind and around your truck.
- Quality Components: Invest in high-quality wiring, connectors, and fuses. Cheap components can lead to voltage drops, overheating, and premature failure.
- Weather Sealing: Use dielectric grease on electrical connections to prevent corrosion, especially in harsh environments.
Price Table: Comprehensive Information on Backup Lights for Trucks
Prices are estimates and can vary based on brand, quality, features, and sales. Professional installation costs are not included.
| Type of Backup Light | Typical Lumens Range (per light/pair) | Price Range (USD) | Key Features / Notes |
|---|---|---|---|
| OEM Replacement Bulbs | 200-500 | $10 – $50 (pair) | Simple LED upgrade for factory bulbs. Limited brightness. May need load resistors. |
| Basic LED Pods/Cubes | 1,000-3,000 | $30 – $100 (pair) | Good entry-level auxiliary lights. Compact, durable, various beam patterns. |
| Mid-Range LED Pods/Cubes | 3,000-8,000 | $100 – $300 (pair) | Significant brightness, enhanced durability (IP67/68), better optics, more versatile. |
| High-End LED Pods/Bars | 8,000-20,000+ | $300 – $800+ | Extreme brightness, premium build quality, advanced thermal management, specialized applications. |
| Small LED Light Bars (6-12") | 2,000-6,000 | $50 – $200 | Offers wider coverage than pods. Often combines flood/spot. |
| Large LED Light Bars (18"+) | 5,000-20,000+ | $200 – $800+ | Maximum illumination, ideal for off-road/commercial use. Requires substantial mounting. |
| Halogen Auxiliary Lights | 500-1,500 | $20 – $80 (pair) | Inexpensive, warm light. Higher power draw, shorter lifespan, generates heat. |
| HID Auxiliary Lights | 4,000-10,000 | $150 – $400 (pair) | Very bright, but complex installation (ballast), slow warm-up time. Less common. |
Frequently Asked Questions (FAQ) About Backup Lights for Trucks
Q1: Are brighter backup lights legal?
A1: Generally, yes, as long as they are white and only illuminate when the vehicle is in reverse gear. Some jurisdictions may have specific limits on the total number or intensity of auxiliary lights used on public roads. Always check your local regulations.
Q2: Do I need a relay for my backup lights?
A2: For most auxiliary LED lights (especially those producing over 1,000 lumens per light), a relay is highly recommended. It protects your truck’s factory wiring by drawing power directly from the battery and using the factory reverse light wire only as a low-current trigger.
Q3: Can I use my backup lights as work lights?
A3: Yes, many people wire their auxiliary backup lights with a separate switch in the cab, allowing them to be turned on manually for work, camping, or loading, even when the truck isn’t in reverse.
Q4: What’s the difference between flood and spot beam patterns?
A4: A flood beam spreads light widely over a short distance, ideal for illuminating a broad area directly behind the truck. A spot beam focuses light into a narrow, concentrated beam for maximum distance. For backup lights, a flood or wide-angle flood is usually preferred.
Q5: What does IP rating mean for lights?
A5: IP (Ingress Protection) rating indicates a light’s resistance to dust and water. The first digit refers to dust (0-6, 6 being dust-tight), and the second refers to water (0-8, 8 being continuous immersion). For backup lights, aim for IP67 or IP68 for excellent durability against the elements.
Q6: Can I install backup lights myself?
A6: If you have basic electrical knowledge and tools, installing auxiliary backup lights is a common DIY project. However, if you’re unsure, or for complex wiring, professional installation is always a safe and reliable option.
Conclusion
Enhanced backup lights for trucks are far more than just an accessory; they are a critical safety and functional upgrade that empowers truck drivers with superior visibility and confidence when maneuvering in reverse. From preventing accidents and protecting property to simplifying trailer hook-ups and boosting productivity, the benefits are undeniable. By understanding the different types of lights available, considering key factors like brightness and beam pattern, and following proper installation guidelines, you can equip your truck with the illumination it needs to tackle any backward journey, day or night. Invest wisely, install correctly, and illuminate your path to safer and more efficient trucking.