Illuminating the Path: A Comprehensive Guide to Truck Light Bars
Illuminating the Path: A Comprehensive Guide to Truck Light Bars
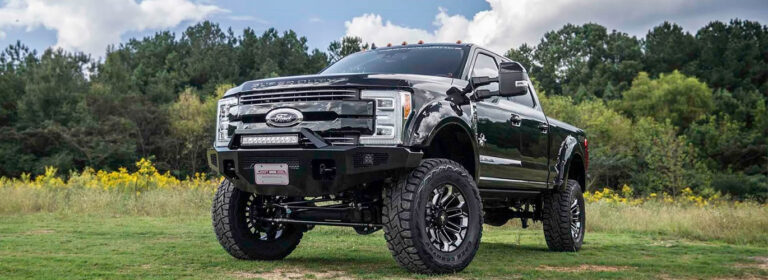
In the vast landscape of truck modifications, few additions combine practicality, safety, and aesthetic appeal as effectively as the truck light bar. More than just a dazzling array of lights, a well-chosen and properly installed light bar transforms a truck’s capabilities, turning night into day and enhancing visibility in the most challenging conditions. Whether you’re navigating treacherous off-road trails, working late on a remote job site, or simply seeking an extra layer of safety on the highway, a truck light bar is an indispensable tool for any serious truck owner.
At its core, a truck light bar is an elongated housing containing multiple high-intensity light-emitting diodes (LEDs) designed to project a powerful beam of light over a wide or focused area. Unlike standard headlights, which are primarily for road illumination and regulated beam patterns, light bars offer immense flexibility in terms of brightness, beam type, and mounting location, making them versatile tools for a myriad of applications.
The Unrivaled Benefits of Truck Light Bars
The appeal of truck light bars extends far beyond their impressive luminosity. Their integration offers a host of practical advantages that significantly enhance a truck’s utility and safety profile:
- Enhanced Visibility & Safety: This is the primary benefit. Light bars cut through darkness, fog, heavy rain, and even snow, revealing obstacles, wildlife, and road hazards far in advance. This increased visibility dramatically reduces the risk of accidents, especially during night driving or in areas with poor street lighting.
- Off-Road Prowess: For adventurers and off-road enthusiasts, light bars are a game-changer. They illuminate trails, rocks, dips, and inclines, allowing for safer and more confident navigation over challenging terrain. Spot beams can penetrate deep into the darkness, while flood beams widen the field of view.
- Worksite Illumination: Tradespeople, farmers, and emergency responders often work in low-light conditions. A powerful light bar mounted on the truck can transform the surrounding area into a well-lit workspace, improving efficiency and safety during late-night repairs, loading, or emergency operations.
- Aesthetic Enhancement: Beyond their functional benefits, light bars add a rugged, aggressive, and modern look to any truck. They instantly convey a sense of capability and adventure, contributing to the overall visual appeal of the vehicle.
- Reduced Eye Strain: By providing ample, consistent light, light bars reduce the strain on a driver’s eyes, especially during long drives at night, contributing to increased alertness and comfort.
Diverse Types and Configurations
The market for truck light bars is incredibly diverse, offering options tailored to virtually every need and preference. Understanding the different types is crucial for making an informed decision:
- By Light Source:
- LED Light Bars: By far the most popular and efficient. LEDs offer incredible brightness, low power consumption, long lifespan (tens of thousands of hours), and instant-on illumination. They are highly durable and perform well in various temperatures.
- Halogen/HID Light Bars: While once common, these are largely superseded by LEDs. Halogen bars are cheaper but consume more power and have a shorter lifespan. HID (High-Intensity Discharge) bars offer great brightness but require a warm-up period and are more fragile.
- By Beam Pattern:
- Spot Beam: Concentrates light into a narrow, focused beam, ideal for long-distance illumination. Perfect for seeing far down a trail or road.
- Flood Beam: Spreads light widely over a shorter distance, excellent for illuminating a broad area directly in front or to the sides of the vehicle. Useful for work lights or wide-angle off-roading.
- Combo Beam: Combines both spot and flood LEDs within a single bar, offering the best of both worlds – long-distance reach and wide-angle coverage. This is often the most versatile choice for general use.
- Driving Beam: A hybrid between spot and flood, designed to mimic a traditional high-beam pattern, optimized for road use (where legal).
- By Design & Size:
- Straight Light Bars: The most common design, offering a linear array of lights. Available in lengths from 4 inches to over 50 inches.
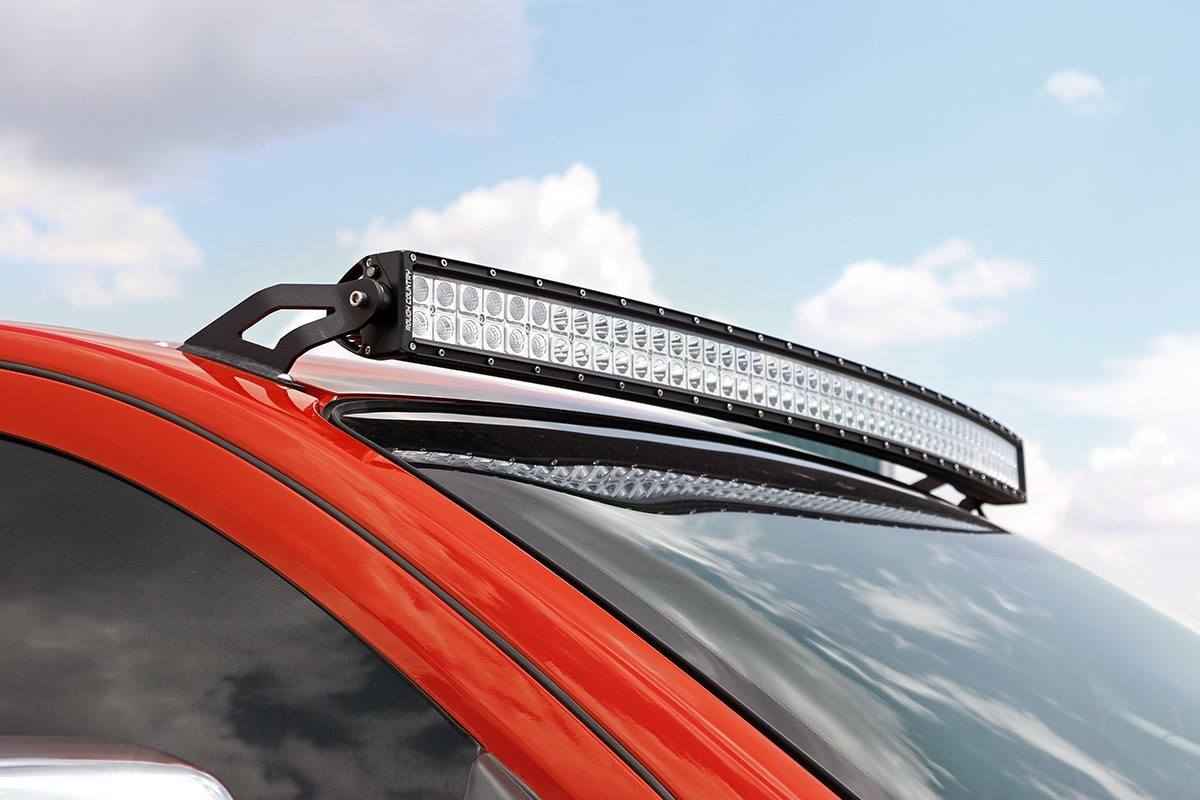
- Curved Light Bars: Designed to follow the contour of a vehicle’s roof or bumper, providing a wider arc of light that can better illuminate the periphery.
- Single Row vs. Dual Row: Single-row bars are more compact and discreet, while dual-row bars offer maximum light output due to having two rows of LEDs.
- Pod Lights/Cubes: Smaller, square or round individual lights that can be mounted in pairs or groups, offering focused light in specific areas (e.g., A-pillar, rear bumper for reverse lights).
A Step-by-Step Guide to Installation & Wiring
While professional installation is always recommended for complex setups, many truck owners with basic mechanical and electrical knowledge can install a light bar themselves. This is a general guide; always refer to your specific product’s instructions.
Tools & Materials:
- The light bar kit (including mounting brackets)
- Wiring harness (relay, fuse, switch)
- Wrench set, socket set, drill (if required for mounting)
- Wire strippers, crimpers
- Electrical tape, heat shrink tubing, zip ties
- Multimeter (for testing)
- Safety glasses
Steps:
- Plan the Mounting Location: Common locations include the front bumper, grille guard, roof rack, or A-pillars. Ensure the chosen spot offers a clear path for the beam, is secure, and doesn’t obstruct vehicle functions (e.g., hood opening).
- Mount the Light Bar:
- Attach the mounting brackets to the light bar.
- Position the light bar on the chosen location. If drilling is required, carefully mark and drill pilot holes. Ensure proper alignment.
- Secure the light bar firmly using the provided hardware. Apply anti-seize compound to bolts if exposed to the elements.
- Route the Wiring Harness:
- Power (Red Wire): Connect to the positive (+) terminal of your truck’s battery, after the fuse holder.
- Ground (Black Wire): Connect to a clean, unpainted metal surface on the truck’s chassis, or directly to the negative (-) terminal of the battery.
- Switch Wire: Route the wire from the relay through the firewall into the cabin to the desired switch location (e.g., dashboard). Use existing grommets or drill a new hole, ensuring it’s sealed afterwards.
- Light Bar Connection: Connect the output wires from the relay to the corresponding wires on the light bar.
- Install the Relay and Fuse:
- Mount the relay in a dry, accessible location in the engine bay, away from excessive heat.
- Ensure the fuse holder is installed on the positive power wire as close to the battery as possible to protect the circuit.
- Install the Switch: Secure the switch in your chosen cabin location. Connect the switch wires according to the wiring diagram (usually power from the relay and a ground wire for the switch’s indicator light).
- Test the System: Before tidying up, connect the battery terminals (if disconnected) and test the light bar. Ensure it turns on and off correctly with the switch. Check for any flickering or issues.
- Secure and Protect Wiring: Once tested, use zip ties to neatly secure all wiring away from moving parts, sharp edges, and excessive heat. Use conduit or loom for added protection against abrasion and the elements.
- Pro Tip: Always disconnect the battery’s negative terminal before starting any electrical work. Use a wiring harness specifically designed for light bars, which typically includes a relay, fuse, and switch for safe and efficient operation.
Important Considerations Before You Buy
Choosing the right truck light bar involves more than just picking the brightest one. Several factors impact performance, legality, and longevity:
- Lumens vs. Watts: Lumens measure brightness (light output), while watts measure power consumption. Focus on lumens for brightness, but be wary of exaggerated claims. A good quality LED bar will have high lumens for its wattage.
- IP Rating (Ingress Protection): This indicates resistance to dust and water. An IP67 rating means the light bar is completely dust-tight and can withstand immersion in water up to 1 meter for 30 minutes. IP68 offers even better protection. Essential for off-road or adverse weather conditions.
- Durability: Look for robust construction. Die-cast aluminum housings are excellent for heat dissipation and strength. Shatterproof polycarbonate or toughened glass lenses are crucial for resisting impacts and scratches.
- Beam Pattern: Revisit the beam pattern types (spot, flood, combo) and choose based on your primary use case.
- Size and Fitment: Measure the intended mounting area on your truck to ensure the light bar fits properly and doesn’t obstruct any vital components or vision.
- Legal Regulations: This is paramount. Light bar laws vary significantly by state, province, and country. Many jurisdictions prohibit the use of light bars on public roads unless covered or wired to only operate with high beams, or have strict limitations on brightness. Always research your local laws before purchasing and installing. Ignorance is not an excuse.
- Brand Reputation & Warranty: Invest in a reputable brand that offers a good warranty. This ensures quality components, reliable performance, and customer support if issues arise. Cheap, no-name bars often disappoint in terms of longevity and actual light output.
Optimizing Performance and Longevity
- Proper Aiming: After installation, carefully aim your light bar. For combo or flood beams, aim slightly downwards to illuminate the immediate foreground and sides without creating excessive glare for oncoming traffic (when used off-road). Spot beams can be aimed further down the trail.
- Regular Cleaning: Dirt, mud, and road grime can significantly reduce light output. Clean the lens regularly with a soft cloth and mild soap. Avoid abrasive cleaners.
- Wiring Inspection: Periodically check wiring connections for corrosion, fraying, or loose terminals, especially after off-road excursions.
- Anti-Theft Measures: Light bars can be attractive targets for theft. Consider using security bolts, specialized locking mounts, or removable designs if possible.
Addressing Potential Challenges
- Glare and Reflected Light: On wet roads, in fog, or when snow is on the ground, the intense light can cause severe glare.
- Solution: Use the light bar only when absolutely necessary (off-road or in severe conditions). Aiming the bar slightly lower can help. Some light bars come with covers that can be used on public roads.
- Wiring Complexity: For those unfamiliar with automotive electrical systems, wiring can seem daunting.
- Solution: Purchase a complete wiring harness kit designed for light bars. Follow detailed diagrams provided with the kit. If unsure, consult a professional auto electrician.
- Legality Issues: As mentioned, public road use is often restricted.
- Solution: Research and adhere to local laws. Use a light bar cover on public roads if required. Wire it to a separate switch that is easily accessible to turn it off when encountering other vehicles.
- Vibration and Mounting Failure: Intense off-road driving can subject light bars to significant vibration, potentially loosening mounts or causing damage.
- Solution: Use heavy-duty, reinforced mounting brackets. Consider adding rubber isolators or anti-vibration pads between the mount and the vehicle surface. Regularly check mounting bolts for tightness.
- Battery Drain: While LEDs are efficient, very large light bars can still draw substantial power if left on for extended periods with the engine off.
- Solution: Only use the light bar when the engine is running. Consider adding a dual battery system for heavy power users if frequent extended use off-engine is anticipated.
Price Guide for Truck Light Bars
Prices vary significantly based on size, brand, quality, lumens, and features. This table provides general price ranges.
| Type / Size | Lumens (Approx.) | Beam Pattern | IP Rating | Price Range (USD) | Key Features / Notes |
|---|---|---|---|---|---|
| Small Pod/Cube (3-6") | 1,500 – 4,000 | Spot/Flood | IP67/IP68 | $20 – $80 | Auxiliary lighting, reverse lights, fog lights |
| Compact Bar (10-14") | 3,000 – 8,000 | Spot/Flood | IP67/IP68 | $50 – $150 | Bumper mount, ATV/UTV, general utility |
| Mid-Size Bar (20-22") | 8,000 – 15,000 | Combo | IP67/IP68 | $100 – $300 | Common bumper/grille size, good balance of light |
| Large Bar (30-32") | 15,000 – 25,000 | Combo | IP67/IP68 | $200 – $500 | Popular roof/grille mount, significant light output |
| Extra Large Bar (40-52") | 25,000 – 40,000+ | Combo | IP67/IP68 | $350 – $1,000+ | Maximum illumination, often roof-mounted, professional grade |
| Curved Bar (30-50") | 15,000 – 35,000+ | Combo | IP67/IP68 | $250 – $900+ | Wider light arc, aesthetically pleasing on roof |
| Premium Brands | High | All types | IP68+ | $500 – $2,000+ | Superior optics, materials, warranty, specific tech |
Note: Prices are estimates and can vary based on retailer, sales, and specific features (e.g., RGB backlighting, specific chipsets).
Frequently Asked Questions (FAQ)
Q1: Are truck light bars legal to use on public roads?
A1: Generally, no. Most jurisdictions consider light bars "off-road use only" lights due to their extreme brightness and uncontrolled beam patterns, which can blind other drivers. Many states require them to be covered or disconnected while on public roads. Always check your local and state laws before use.
Q2: How many lumens do I need for my light bar?
A2: It depends on your intended use. For general utility or light off-roading, 8,000-15,000 lumens is usually sufficient. For serious off-roading or work site illumination, 20,000+ lumens might be desired. Don’t solely rely on lumen claims; research reputable brands and look for actual beam patterns.
Q3: Can I install a truck light bar myself?
A3: Yes, if you have basic mechanical skills, a good understanding of automotive electrical systems, and the right tools. Most light bar kits come with detailed instructions and a wiring harness. However, if you’re uncomfortable with wiring, it’s best to hire a professional to ensure safe and correct installation.
Q4: What’s the difference between a spot beam and a flood beam?
A4: A spot beam concentrates light into a narrow, long-distance beam, ideal for seeing far ahead. A flood beam spreads light widely over a shorter distance, excellent for illuminating a broad area close to the vehicle. A combo beam combines both for versatile lighting.
Q5: Do light bars drain the truck’s battery?
A5: LED light bars are energy-efficient, but large ones still draw significant power. If left on for extended periods with the engine off, they can drain your battery. It’s recommended to only use your light bar when the engine is running to prevent battery discharge.
Q6: How do I protect my light bar from theft?
A6: Common methods include using security bolts (requiring special tools for removal), anti-theft nuts, or investing in locking mounting brackets. Some light bars are designed to be easily removable for storage when not in use.
Conclusion
A truck light bar is more than just an accessory; it’s a significant upgrade that empowers your vehicle with unparalleled visibility and utility. From enhancing safety on dark roads to transforming rugged trails into navigable paths, and illuminating remote workspaces, the benefits are undeniable. By understanding the various types, considering crucial factors like IP rating and legal compliance, and approaching installation with care, truck owners can confidently choose and integrate the perfect light bar. It’s an investment that pays dividends in safety, capability, and the sheer joy of seeing the world more clearly, no matter where your truck takes you.