How to Put Christmas Lights on a Truck: A Comprehensive Guide to Dazzling Your Ride
How to Put Christmas Lights on a Truck: A Comprehensive Guide to Dazzling Your Ride
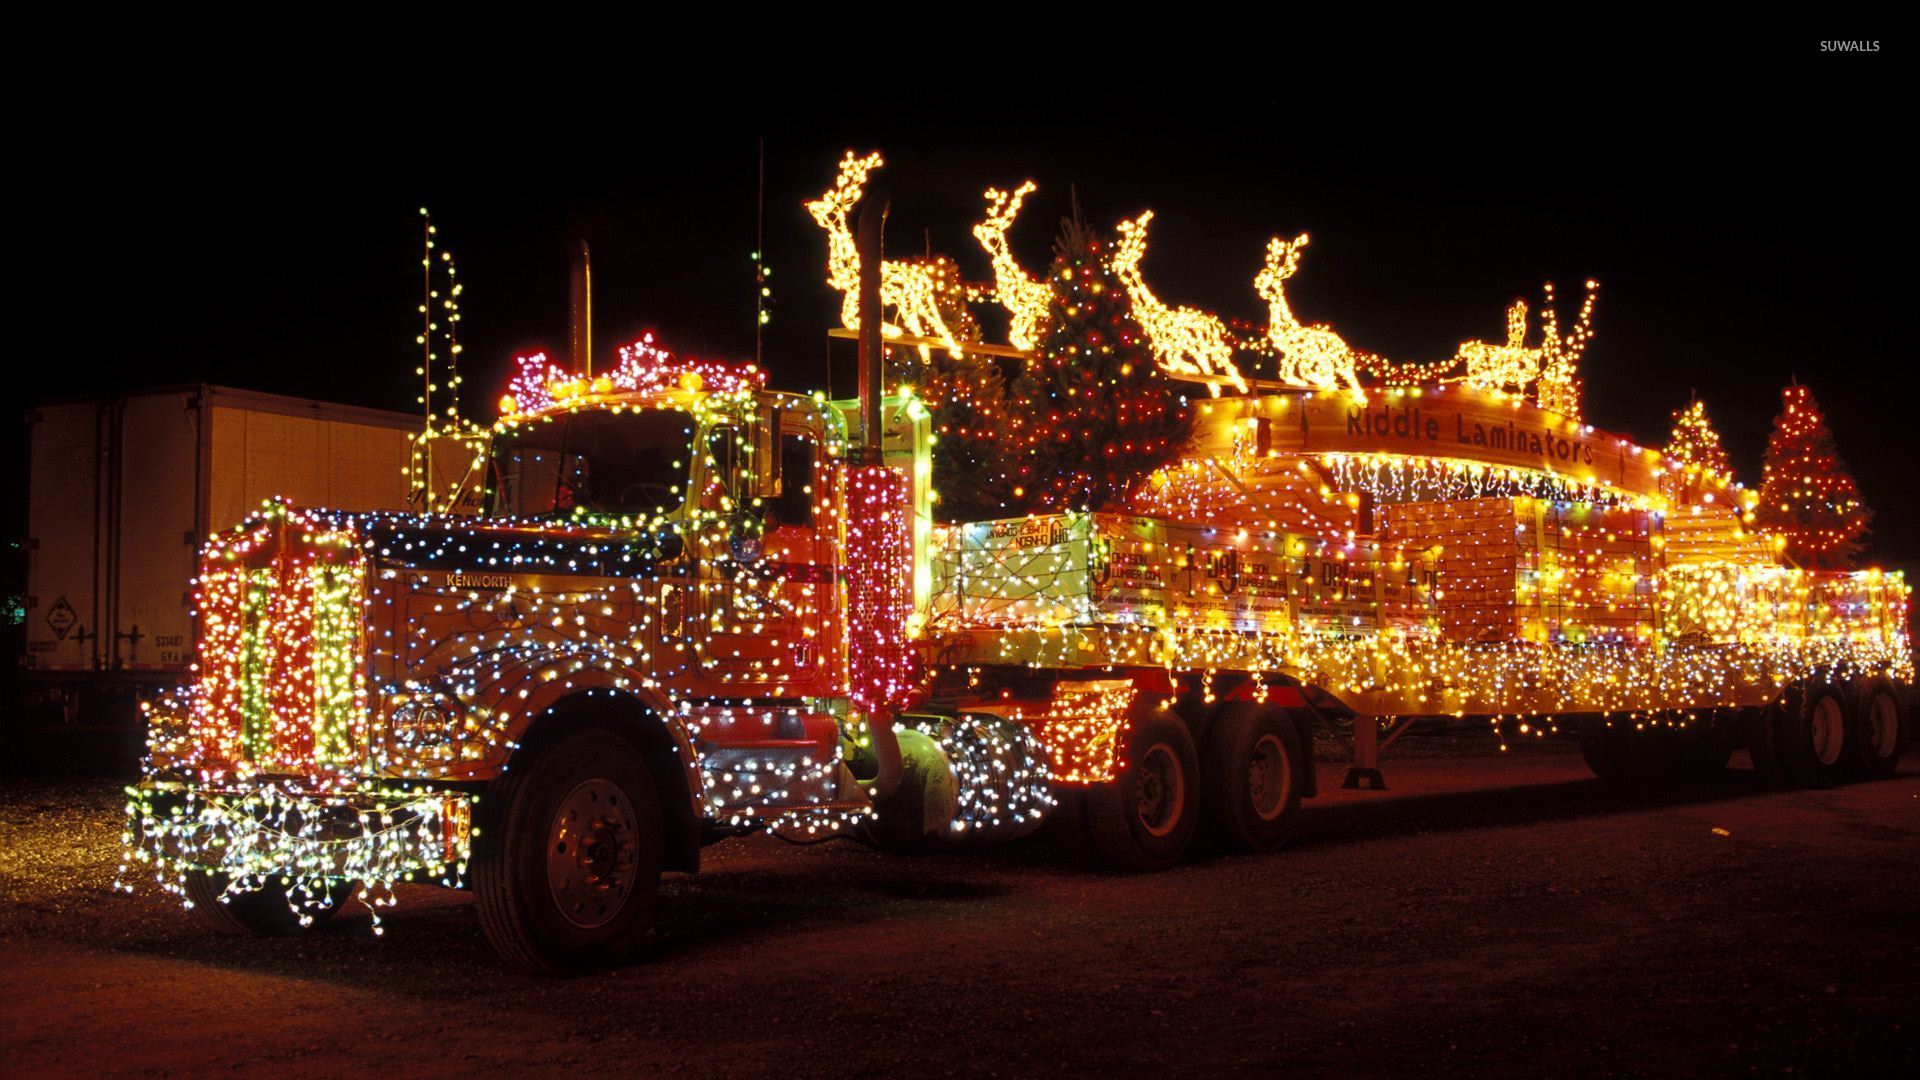
The holiday season brings with it a unique opportunity to spread cheer and capture the festive spirit. While homes are traditionally adorned with twinkling lights, there’s a growing trend that takes the festive glow on the road: decorating your truck with Christmas lights. Learning how to put Christmas lights on a truck transforms your vehicle into a mobile spectacle, perfect for holiday parades, community events, or simply brightening up your daily commute. It’s a fun, creative project that combines automotive enthusiasm with holiday magic, allowing you to stand out and share joy wherever you go.
This comprehensive guide will walk you through every step of transforming your truck into a dazzling holiday masterpiece. From initial planning and material selection to the intricate details of installation, power management, and safety, we’ll cover everything you need to know to achieve a stunning and safe display.
1. Planning Your Dazzling Display: Setting the Foundation for Success
Before you unroll a single strand of lights, thoughtful planning is crucial. This stage determines the scope, complexity, and ultimate success of your truck’s festive transformation.
Define Your Purpose
- Parade/Event Vehicle: If your truck is for a specific parade or stationary display, you can go all out with power sources (like a generator in the bed) and extensive coverage, as driving visibility isn’t a primary concern during the event itself.
- Daily Driver: For a truck that will be driven regularly with lights on, safety and legality are paramount. Lights must not obstruct vision, be securely attached, and adhere to local traffic laws regarding light colors and brightness.
- Stationary Yard Display: If the truck will be parked as part of a larger home display, you have more flexibility with power and less concern for road regulations.
Assess Your Truck
- Size and Shape: A larger truck offers more surface area for lights but requires more materials and power. Consider the contours of your truck – the grille, cab roof, mirrors, bed rails, and tailgate all offer unique opportunities for light placement.
- Power Source Access: Do you have an inverter? Will you need battery packs? How will you run wires discreetly and safely?
- Attachment Points: Identify existing hooks, railings, seams, or flat surfaces where lights can be securely fastened without damaging the paint or body.
Design Considerations
- Theme and Color Scheme: Will it be traditional red and green, a frosty blue and white, or a vibrant multi-color display? Do you want to incorporate specific shapes (stars, snowflakes) or a holiday scene?
- Coverage: Do you want to outline the truck, cover specific sections, or create a fully illuminated "glow" effect?
- Visibility: Plan how the lights will look from different angles – front, sides, rear, and from above.
2. Essential Tools and Materials: Gathering Your Arsenal
Having the right tools and materials is half the battle. Invest in quality components for a safer, more durable, and more impressive display.
Types of Lights
- LED vs. Incandescent: LEDs are highly recommended. They are more energy-efficient (drawing less power, crucial for battery life), cooler to the touch, more durable, and last longer. Incandescent lights draw more power, get hot, and are more fragile.
- Light Styles:
- C7/C9 Bulbs: Larger, traditional-looking bulbs, great for outlining and creating a classic feel.
- Mini Lights (M5, 5mm, Wide Angle): Versatile for wrapping, weaving, and intricate designs.
- Rope Lights: Provide a continuous, diffused glow, excellent for outlining shapes or underbody lighting.
- Net Lights: Quick coverage for flat surfaces like the truck bed or large panels.
- Battery-Operated Lights: Ideal for areas where cords are difficult to run, like mirrors or small accent spots.
- Magnetic Lights: Some lights come with magnetic bases, simplifying attachment to metal surfaces.
Power Considerations
- Power Inverter: Essential for converting your truck’s 12V DC power to 120V AC power for standard string lights. Choose an inverter with sufficient wattage to handle your total light load (add up the wattage of all your light strands). A pure sine wave inverter is best for sensitive electronics, though modified sine wave can work for most lights.
- Portable Power Station/Battery Packs: For extensive displays or if you want to avoid draining your truck’s battery, a dedicated portable power station or deep-cycle marine battery with an inverter is an excellent solution.
- Extension Cords: Outdoor-rated, heavy-gauge extension cords are crucial for safely extending power from your inverter to various parts of the truck.
- Fuses/Circuit Breakers: Ensure your inverter and wiring have appropriate overload protection.
- Timers/Smart Plugs: For convenience and managing power usage, especially if the truck is parked.
Attachment Methods
- UV-Resistant Zip Ties: The workhorse of light attachment. Get plenty of various lengths.
- Magnetic Hooks/Clips: Excellent for attaching to metal surfaces without damage.
- Suction Cups with Hooks: Useful for windows or smooth, non-porous surfaces.
- Automotive-Grade Adhesive Hooks: Stronger than standard adhesive hooks, but ensure they are safe for paint. Test in an inconspicuous area first.
- Bungee Cords/Straps: For securing larger items or bundles of lights.
- Gutter Hooks (Modified): Can sometimes be adapted for truck seams or bed rails.
Safety and Other Tools
- Work Gloves: Protect your hands.
- Ladder/Step Stool: For reaching high spots safely.
- Measuring Tape: For accurate planning.
- Wire Cutters/Strippers: For custom wiring (if applicable).
- Electrical Tape (Outdoor-rated): For securing connections and minor repairs.
- Multi-meter: To check voltage and continuity if troubleshooting.
- Plastic Trim Removal Tools: Useful for tucking wires without damaging trim.
3. Pre-Installation Checklist and Safety First: Preparing for the Sparkle
Safety should always be your top priority. A little preparation goes a long way in preventing hazards and ensuring a successful display.
- Clean the Truck: A clean surface allows adhesive hooks and suction cups to adhere better.
- Test All Lights: Before installation, plug in every strand and bulb to ensure they work. Replace any burnt-out bulbs or faulty strands.
- Check Wiring and Connections: Inspect all cords, plugs, and light strands for fraying, cuts, or exposed wires. Discard damaged items.
- Understand Power Limits: Calculate the total wattage of all your lights. Ensure your inverter can handle this load comfortably, with a buffer. Overloading can trip breakers, damage the inverter, or even cause fires.
- Weather Considerations: If the lights will be exposed to rain or snow, all components (lights, cords, connections) must be outdoor-rated and waterproof. Use dielectric grease on connections to prevent corrosion.
- Work Safely:
- Ladder Stability: Always use a stable ladder or step stool on a level surface.
- Avoid Water: Never work with electrical components in wet conditions.
- Gloves: Wear work gloves.
- Battery Disconnect: If working near the truck’s battery or wiring, consider disconnecting the negative terminal as a precaution.
- Fire Extinguisher: Keep a small fire extinguisher nearby as a precaution, especially when dealing with electrical components.
4. Step-by-Step Installation Guide: Bringing Your Vision to Life
This is where the magic happens! Follow these steps for a systematic and effective installation.
4.1. Power Source Setup
- Inverter Placement: Secure your power inverter in a well-ventilated area, away from moisture and flammable materials. The truck bed or passenger footwell (if wired safely) are common spots. Ensure it’s stable and won’t move while driving.
- Wiring the Inverter: Connect the inverter directly to your truck’s battery (for higher wattage inverters) or via the cigarette lighter socket (for lower wattage). Use appropriately gauged wire and inline fuses for direct battery connections.
- Portable Power Station: If using, ensure it’s fully charged and securely placed.
4.2. Strategic Placement and Attachment
Start from the power source and work outwards, or begin with the most prominent features of your truck.
- Cab:
- Roofline: Outline the roof with rope lights or C7/C9 bulbs, secured with magnetic clips or adhesive hooks.
- Grille: Weave mini lights through the grille openings, or outline the grille with rope lights, securing with zip ties.
- Headlights/Tail Lights: Frame them with light strands. Ensure lights do not obstruct or mimic essential vehicle lights (headlights, brake lights, turn signals).
- Mirrors: Wrap mini lights around the mirror housing, securing with small zip ties or battery-operated lights.
- Windows: Use suction cup lights or outline with mini lights secured along the window trim (ensure no obstruction of view).
- Truck Bed:
- Bed Rails: Outline the top of the bed rails with C7/C9 or rope lights, securing with zip ties or modified gutter hooks.
- Tailgate: Outline the tailgate, paying attention to not block the license plate or brake lights.
- Inside Bed: If empty, you can drape net lights or create a festive scene inside.
- Underbody/Wheels:
- Rope Lights: Attach waterproof rope lights along the frame or wheel wells for a ground glow effect. Use robust zip ties or specialized clips.
- Wheel Spoke Lights: Special battery-operated or wired LED lights can be attached to wheel spokes (ensure they don’t interfere with braking or turning).
- General Outline: Use light strands to trace the truck’s major lines – along the doors, fenders, and bumpers.
4.3. Securing the Lights
- Tight and Tidy: Ensure all lights are pulled taut but not strained. Loose wires and strands can snag or fall off.
- Damage Prevention: Use non-abrasive attachment methods where possible. If using zip ties, place a small piece of foam or cloth between the zip tie and painted surface to prevent scratches.
- Adhesion Tips: For adhesive hooks, ensure the surface is clean, dry, and warm enough for optimal adhesion. Allow curing time if recommended by the product.
4.4. Wiring and Management
- Concealment: Run extension cords and light wires along seams, under trim, or through the truck bed to keep them out of sight and protected.
- Protection: Wrap exposed connections with outdoor-rated electrical tape or use waterproof connection boxes. Keep all plugs and connections off the ground.
- Strain Relief: Leave a little slack at connection points to prevent strain on the wires.
- Fuse Boxes: If running multiple circuits from your inverter, consider a small, weatherproof fuse box for easier management and protection.
4.5. Testing and Troubleshooting
- Initial Test: Once all lights are installed, plug them in and test the entire display.
- Circuit Check: If a section isn’t working, check the connections, fuses, and individual bulbs. Many LED strands are designed so that if one bulb goes out, the rest remain lit.
- Brightness and Balance: Step back and assess the overall look. Are there any dark spots? Is the brightness balanced? Adjust as needed.
5. Maintenance and Storage: Extending the Life of Your Display
Proper care during and after the season will ensure your lights last for years to come.
- Regular Checks: Periodically inspect lights and connections for wear, damage, or loosened attachments, especially after adverse weather.
- Weatherproofing: Reapply electrical tape or dielectric grease if needed. Ensure no water can pool around electrical connections.
- Safe Removal: Carefully remove lights, detaching them slowly to avoid pulling or breaking wires.
- Proper Storage: Coil each strand neatly. Store lights in clear plastic bins, ideally with cardboard dividers, in a cool, dry place. This prevents tangling and protects bulbs.
6. Advanced Tips and Creative Ideas
- Synchronized Lighting: Invest in a light controller that allows lights to flash or change patterns to music.
- Adding Props: Incorporate inflatables (if space and power allow), garlands, bows, or even a small, lighted Christmas tree in the truck bed.
- Smart Plugs/Timers: Use Wi-Fi enabled smart plugs with your inverter for remote control and scheduling.
- Thematic Displays: Beyond general Christmas, consider a "Winter Wonderland" with only white/blue lights, or a "North Pole Express" with toy props.
7. Potential Challenges and Solutions
- Power Drain: Use LED lights, a high-capacity inverter, or a dedicated deep-cycle battery. Monitor your truck’s battery voltage.
- Weather Damage: Use only outdoor-rated, waterproof lights and connections. Secure everything tightly to withstand wind.
- Lights Falling Off: Double-check attachment methods. Use multiple points of contact. Consider stronger adhesives or more zip ties.
- Visibility Issues (for driving): Ensure lights do not obstruct your view, interfere with other drivers’ vision, or block essential vehicle lights. Always prioritize safety over aesthetics.
- Legal Considerations: Research local ordinances regarding vehicle lighting. Some areas have restrictions on color (e.g., no blue or red flashing lights that could mimic emergency vehicles), brightness, or placement.
Table Price: Estimated Costs for Decorating Your Truck
Prices can vary significantly based on quality, brand, and where you purchase items. This table provides a general estimate for the components you’ll need.
| Category | Item Description | Low End (USD) | Mid Range (USD) | High End (USD) | Notes |
|---|---|---|---|---|---|
| Lights | LED String Lights (Mini, C7/C9, Rope, Net) | $50 | $150 | $500+ | Based on length, number of strands, and quality. LED is more expensive upfront but cheaper to run. |
| Power Conversion | Power Inverter (300W-1500W) | $30 | $100 | $300+ | Depends on wattage needed. Pure sine wave inverters are pricier. |
| Power Storage | Portable Power Station / Deep Cycle Battery & Box | $0 | $200 | $800+ | Optional, but highly recommended for extensive displays or to avoid draining truck battery. |
| Extension Cords | Outdoor-rated, heavy-gauge extension cords | $20 | $50 | $100 | For connecting inverter to lights and distributing power. |
| Attachment Supplies | Zip ties, magnetic clips, adhesive hooks, bungee cords | $15 | $40 | $80 | Bulk packs are cost-effective. UV-resistant zip ties are a must. |
| Safety/Tools | Electrical tape, gloves, wire cutters, fuses, ladder | $20 | $50 | $100 | Essential for safe installation and maintenance. |
| Optional Enhancements | Timers, smart plugs, light controllers, props | $0 | $50 | $200+ | For added convenience and advanced display features. |
| Total Estimated Cost | (Excluding Truck) | $135 | $640 | $2080+ | This is a broad range. Your actual cost will depend on the scale and complexity of your desired display. |
Frequently Asked Questions (FAQ)
Q1: Can I use regular household Christmas lights on my truck?
A1: Yes, if they are rated for outdoor use and you have an inverter to convert your truck’s 12V DC power to 120V AC (standard household current). However, LED lights are strongly recommended over incandescent for their efficiency, durability, and cooler operation.
Q2: How do I power the lights without draining my truck’s battery?
A2: For extensive displays, use a dedicated power source like a portable power station or a deep-cycle marine battery with its own inverter, charged separately. For smaller displays, a quality power inverter connected to your truck’s battery can work, but monitor your battery voltage, especially if the engine is off. Consider using only LED lights to minimize power draw.
Q3: Are there any legal restrictions on putting lights on my truck?
A3: Yes, laws vary by state and local municipality. Generally, lights should not:
- Obscure your vision or the visibility of your truck’s essential lights (headlights, tail lights, turn signals, brake lights, license plate).
- Be blue or red flashing lights, which can mimic emergency vehicles.
- Be excessively bright or distracting to other drivers.
Always check your local Department of Motor Vehicles (DMV) or police department for specific regulations.
Q4: How long does it typically take to install Christmas lights on a truck?
A4: This depends heavily on the complexity of your design and your experience level. A simple outline might take 2-4 hours, while an elaborate, multi-strand display could take 8-16 hours or more, spread over several days. Planning and preparation time should also be factored in.
Q5: How do I protect the lights and wiring from weather?
A5: Use only outdoor-rated, waterproof lights and extension cords. Secure all connections with electrical tape or use waterproof connection boxes. Keep plugs off the ground and away from puddles. Ensure lights are tightly secured to prevent wind damage.
Q6: Will the lights damage my truck’s paint?
A6: If proper attachment methods are used, damage should be minimal or non-existent. Avoid using duct tape or permanent adhesives directly on paint. Opt for UV-resistant zip ties, magnetic clips, or automotive-grade adhesive hooks designed for vehicle use. Always test adhesive products in an inconspicuous area first.
Conclusion
Transforming your truck into a festive beacon of holiday cheer by learning how to put Christmas lights on a truck is a rewarding project that combines technical know-how with creative expression. From the initial spark of an idea to the final, glowing display, success hinges on meticulous planning, careful material selection, and a strong emphasis on safety. By following the steps outlined in this guide, you can confidently create a dazzling, road-worthy spectacle that captures the spirit of the season. So, gather your supplies, fire up your imagination, and get ready to light up the road with your unique, mobile Christmas masterpiece!
