Curved Light Bar for Truck: Illuminating Your Adventures with Style and Superior Spread
Curved Light Bar for Truck: Illuminating Your Adventures with Style and Superior Spread
In the world of truck customization and off-road exploration, lighting is not just about visibility; it’s about performance, safety, and making a statement. Among the myriad of auxiliary lighting options, the curved light bar for truck has emerged as a particularly popular and effective choice. Moving beyond the traditional straight designs, these innovative light bars offer a unique blend of enhanced illumination, sophisticated aesthetics, and practical advantages for any truck enthusiast.
This comprehensive guide will delve deep into everything you need to know about curved light bars, from their fundamental design to their installation, benefits, and how to choose the perfect one for your rig.
What is a Curved Light Bar for Truck?
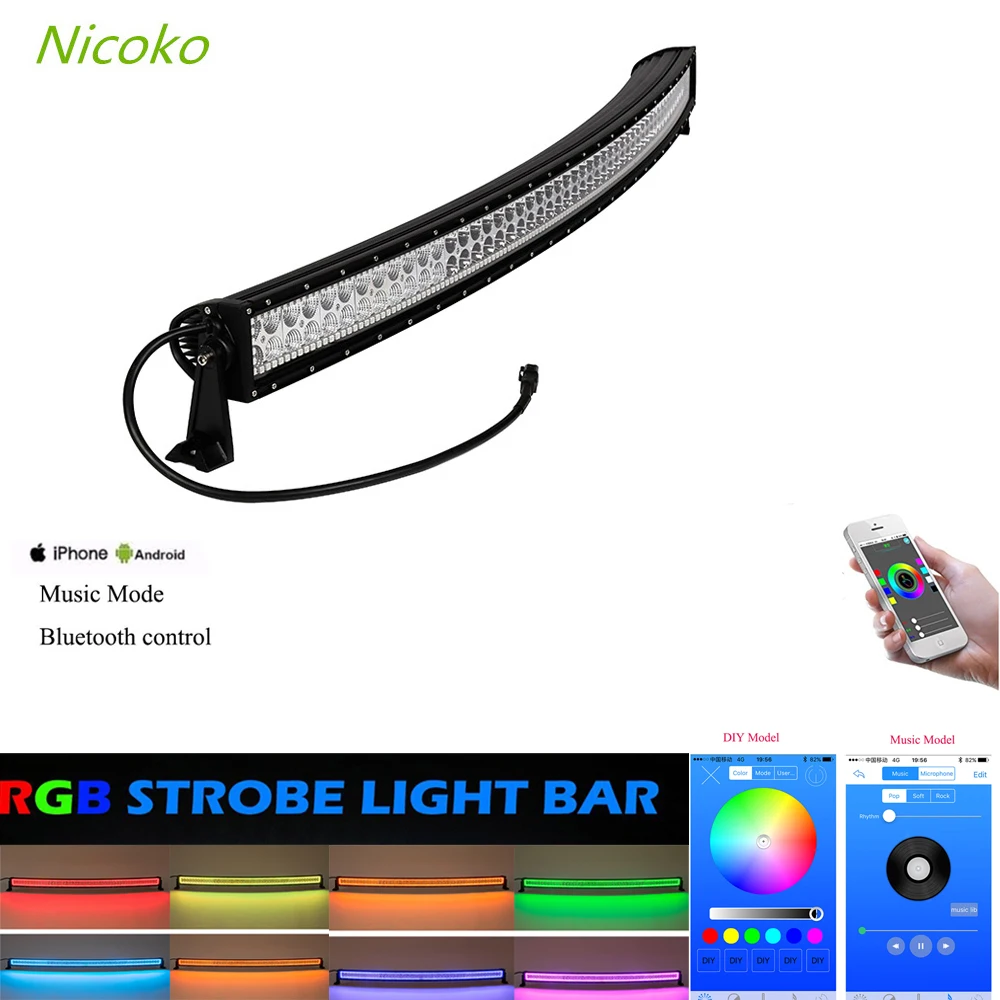
A curved light bar is an auxiliary LED lighting unit specifically designed with a gentle arc or bend along its length, rather than a straight, rigid form. This curvature is not merely for aesthetics; it’s engineered to provide a wider, more expansive beam of light, better conforming to the natural field of vision and the contours of the terrain. Typically mounted on the roof, bumper, or grille of trucks, SUVs, and other off-road vehicles, these bars are packed with high-intensity LED chips, offering significantly more illumination than standard vehicle headlights. They are built tough, designed to withstand the harsh conditions of off-roading, including vibrations, impacts, dust, and water.
The relevance of a curved light bar lies in its ability to transform night driving and off-road adventures. Whether you’re navigating treacherous trails, working in low-light conditions, or simply seeking to enhance your truck’s formidable presence, a curved light bar provides unparalleled forward and peripheral vision, making every journey safer and more enjoyable.
The Distinct Advantages of Curved Light Bars
While straight light bars are effective, curved light bars offer several compelling benefits that make them a superior choice for many truck owners:
- Superior Light Spread: This is the primary advantage. The curved design naturally projects light outwards, covering a wider area than a straight bar of equivalent length. This means better illumination of ditches, shoulders, and obstacles to the sides of your vehicle, significantly enhancing peripheral vision, which is crucial for off-roading and spotting wildlife.
- Reduced Glare and Hot Spots: By distributing light more evenly across a wider arc, curved light bars tend to minimize intense "hot spots" directly in front of the vehicle. This can lead to a more comfortable viewing experience and less eye strain over long periods.
- Enhanced Aesthetics: Aesthetically, curved light bars often integrate more seamlessly with the lines of modern trucks and SUVs. Their contoured design complements the vehicle’s natural curves, providing a sleeker, more factory-installed look compared to the sometimes stark appearance of a straight bar.
- Aerodynamic Benefits (Minor): While subtle, the curved shape can potentially reduce wind resistance and whistling compared to some straight bar designs, especially when roof-mounted. This is often mitigated further by specific anti-whistle fins or mounting techniques.
- Improved Depth Perception: The broader, more consistent light field can help drivers better judge distances and perceive the terrain’s contours, aiding in navigating challenging environments.
Types and Categories of Curved Light Bars
Curved light bars come in various configurations, each tailored to specific needs and preferences:
- Size: They range from compact 20-inch bars suitable for bumpers to massive 50-inch or 52-inch bars designed for roof mounting. The ideal size depends on your vehicle, mounting location, and desired light output.
- Beam Pattern:
- Spot Beam: Concentrates light into a narrow, long-distance beam, ideal for seeing far ahead.
- Flood Beam: Disperses light widely over a shorter distance, excellent for illuminating broad areas around the vehicle.
- Combo Beam: The most common and versatile, combining spot LEDs in the center for distance and flood LEDs on the outer edges for peripheral spread. Curved bars excel with combo patterns, maximizing their inherent wide throw.
- LED Chip Type: The quality and type of LED chips significantly impact brightness, efficiency, and longevity. Common high-quality brands include Cree, Osram, and Philips.
- Construction and IP Rating: Look for robust aluminum housings for heat dissipation and durability, and a high IP (Ingress Protection) rating (e.g., IP67 or IP68) to ensure resistance against dust and water intrusion.
- Mounting Options: Dedicated mounting brackets are available for various locations, including roof (often with custom rain gutter or drill-through mounts), front bumper (using existing bolt holes or bull bar mounts), and grille inserts.
Important Considerations Before Purchase
Choosing the right curved light bar requires careful thought to ensure it meets your needs and complies with regulations:
- Legality: Crucially, in most regions, high-intensity off-road light bars are NOT street legal for use on public roads. They are designed for off-road or private property use only. Using them on highways can blind oncoming drivers and lead to fines. Always check your local and state laws. Many setups include a separate switch to ensure they are only activated when safe and legal.
- Power Draw: High-power LED light bars draw significant current. Ensure your truck’s electrical system can handle the additional load. It’s highly recommended to use a proper wiring harness with a relay and fuse to protect your vehicle’s electrical components.
- Quality and Durability: Invest in a reputable brand. Cheaper bars may use inferior LEDs, poor heat sinks, or flimsy construction, leading to premature failure. Look for features like:
- Die-cast aluminum housing: For strength and heat dissipation.
- High-quality polycarbonate lens: Impact and scratch-resistant.
- Efficient heat sinks: Essential for LED longevity.
- Stainless steel mounting hardware: Resists corrosion.
- Warranty: A good warranty indicates the manufacturer’s confidence in their product.
- Beam Pattern Matching: Consider your primary use. If you need far-reaching light for high-speed desert running, a more spot-focused combo might be best. For slow rock crawling or work, a wider flood-heavy combo is preferable.
- Aesthetics and Fitment: Measure your desired mounting location carefully to ensure the bar fits without obstructing other components or looking disproportionate.
Practical Advice for Choosing and Using
- Assess Your Needs: Are you primarily off-roading, overlanding, or using it for work? This will dictate size, beam pattern, and durability requirements.
- Measure Twice, Buy Once: Double-check the dimensions of your desired mounting location before purchasing to ensure a perfect fit.
- Don’t Skimp on Wiring: A high-quality, pre-made wiring harness with a relay, fuse, and waterproof connectors will save you headaches and prevent electrical issues.
- Consider Professional Installation: While many DIY enthusiasts can handle light bar installation, if you’re uncomfortable with electrical wiring or drilling into your vehicle, a professional installer can ensure a safe and clean setup.
- Regular Maintenance: Keep the lens clean for optimal light output. Periodically check mounting bolts and wiring connections for tightness and corrosion.
How-To Guide: Basic Installation Steps (General Overview)
Installing a curved light bar typically involves mounting the bar and wiring it to your truck’s electrical system. This is a general guide; always refer to the specific instructions provided by the manufacturer of your light bar and mounting kit.
Tools You Might Need: Wrenches/sockets, drill (if required for mounting), wire strippers/crimpers, electrical tape, heat shrink tubing, multimeter, zip ties.
Materials: Curved light bar, mounting brackets, wiring harness (with relay and fuse), in-cab switch, additional wiring (if needed).
- Choose Mounting Location & Test Fit: Decide where to mount the bar (roof, bumper, grille). Test fit the bar and brackets to ensure proper alignment and clearance.
- Secure the Light Bar: Attach the mounting brackets to your truck. This may involve drilling holes (e.g., for roof mounts) or utilizing existing factory mounting points. Securely attach the light bar to the brackets. Ensure it’s level and aimed correctly.
- Run Wiring (Power & Ground):
- Power Wire: Route the main power wire from the light bar towards your battery. For roof mounts, you’ll need to carefully route it down the windshield pillar, often under weather stripping, to protect it.
- Ground Wire: Connect the light bar’s ground wire to a clean, unpainted metal surface on the truck’s chassis, or run it directly to the negative terminal of the battery.
- Connect to Relay & Fuse: The power wire from the light bar should connect to the output side of a heavy-duty automotive relay. The relay’s input side connects (via a fuse) directly to the positive terminal of your truck’s battery. This protects your vehicle’s electrical system from power surges and draws.
- Install In-Cab Switch: Route a smaller "trigger" wire from the relay into the cabin. Connect this wire to an aftermarket switch, which you will mount in a convenient location on your dashboard. The switch will also need a ground connection and a power source (often a switched ignition source so the bar can’t be accidentally left on).
- Test Connections: Before tidying up, connect the battery and test the light bar. Ensure the switch activates and deactivates the bar correctly.
- Secure and Tidy Wiring: Once confirmed, use zip ties to secure all wiring, ensuring it’s away from hot engine components, moving parts, and sharp edges. Use loom or conduit for added protection. Seal any holes you drilled to prevent water leaks.
Disclaimer: If you are not comfortable with automotive electrical systems, it is highly recommended to seek professional installation to avoid damage to your vehicle or the light bar.
Potential Challenges and Solutions
- Wind Noise/Whistling: Roof-mounted light bars can sometimes cause wind noise.
- Solution: Many bars come with anti-whistle fins. Proper mounting and ensuring a tight fit can also reduce noise. Some users apply rubber weatherstripping to gaps.
- Glare to Oncoming Traffic: Using off-road light bars on public roads is illegal and dangerous.
- Solution: Only activate the light bar in appropriate off-road or private property settings. Always switch it off when encountering other vehicles.
- Electrical Drain: High-power bars can strain older electrical systems.
- Solution: Ensure your alternator and battery are healthy. Consider upgrading if you plan multiple accessories. Always use a proper fused relay harness.
- Mounting Vibrations: Poorly mounted bars can vibrate, reducing light effectiveness and potentially damaging the bar or vehicle.
- Solution: Use robust, vehicle-specific mounting brackets. Ensure all bolts are tightened securely. Add rubber isolators if needed.
- Water Ingress: Cheaper bars can suffer from water leaks, leading to LED failure.
- Solution: Invest in light bars with high IP ratings (IP67/IP68) from reputable manufacturers.
Curved Light Bar Price Table
Prices for curved light bars vary significantly based on size, brand, LED chip quality, IP rating, and features. This table provides a general price range for common options:
| Model Type | Size (Inches) | Beam Pattern | LED Type | IP Rating | Typical Price Range (USD) | Key Features / Notes |
|---|---|---|---|---|---|---|
| Entry-Level Standard | 20-30 | Combo | Epistar | IP67 | $50 – $150 | Basic functionality, good for casual use. |
| Mid-Range Performer | 30-42 | Combo/Spot | Cree/Osram | IP67/IP68 | $150 – $400 | Better build quality, brighter, more durable. |
| Premium Off-Road | 42-52 | Combo | Cree/Osram | IP68 | $400 – $800+ | Top-tier brightness, robust construction, advanced optics. |
| Slimline/Low Profile | 20-40 | Combo | Cree/Osram | IP67/IP68 | $100 – $350 | Designed for tighter spaces, sleek look. |
| Dual Row (High Output) | 30-50 | Combo | Cree/Osram | IP68 | $250 – $700+ | Maximum light output, often thicker profile. |
Note: Prices are estimates and can fluctuate based on retailer, sales, and specific product features. Installation costs are typically separate.
Frequently Asked Questions (FAQ)
Q1: Are curved light bars street legal?
A1: Generally, no. High-intensity light bars are designed for off-road or private property use only. Using them on public roads can blind other drivers and is illegal in most jurisdictions.
Q2: How do curved light bars differ from straight light bars?
A2: The main difference is the light spread. Curved bars project a wider, more natural arc of light, enhancing peripheral vision, whereas straight bars provide a more focused, forward-only beam. Curved bars also often offer a more integrated aesthetic.
Q3: What size curved light bar do I need for my truck?
A3: This depends on your truck’s model, the intended mounting location (bumper, grille, roof), and your desired light output. Measure the available space carefully before purchasing. Common sizes range from 20 to 52 inches.
Q4: Do curved light bars cause wind noise or whistling?
A4: Some roof-mounted light bars can generate wind noise. Many manufacturers incorporate anti-whistle fins or specific mounting designs to mitigate this. Proper installation and sealing can also help.
Q5: Can I install a curved light bar myself?
A5: Yes, if you have basic automotive electrical knowledge and the right tools. However, improper wiring can damage your vehicle’s electrical system. If you’re unsure, professional installation is highly recommended.
Q6: What does IP67 or IP68 mean for a light bar?
A6: IP (Ingress Protection) ratings indicate how well a device is protected against solids (dust) and liquids (water). IP67 means it’s fully dust-tight and can withstand immersion in water up to 1 meter for 30 minutes. IP68 offers protection against continuous immersion beyond 1 meter. Higher ratings mean better durability in harsh conditions.
Conclusion
A curved light bar for your truck is more than just an accessory; it’s an investment in enhanced visibility, safety, and the overall capability of your vehicle. With their superior light spread, sleek design, and robust construction, these lighting solutions illuminate your path less traveled, transforming night into day and allowing you to confidently tackle any adventure. By considering the factors outlined in this guide – from legality and quality to size and beam pattern – you can select the perfect curved light bar to complement your truck and light up your journey for years to come. Drive with confidence, explore with clarity, and make your truck truly stand out.
